Collections
Collection is the category where the user can create a collection based on the existing data sources, or can create a new one from scratch. The data of the data source can be explored on table designer, it can change or also create completely new ones. The collection can be linked to a git repo.
Example
Create a collection
To create a collection, the user must click on Collection tab from the menu on the left.
If there are no collections configured, the user can click on Add Collection button to add a new collection.

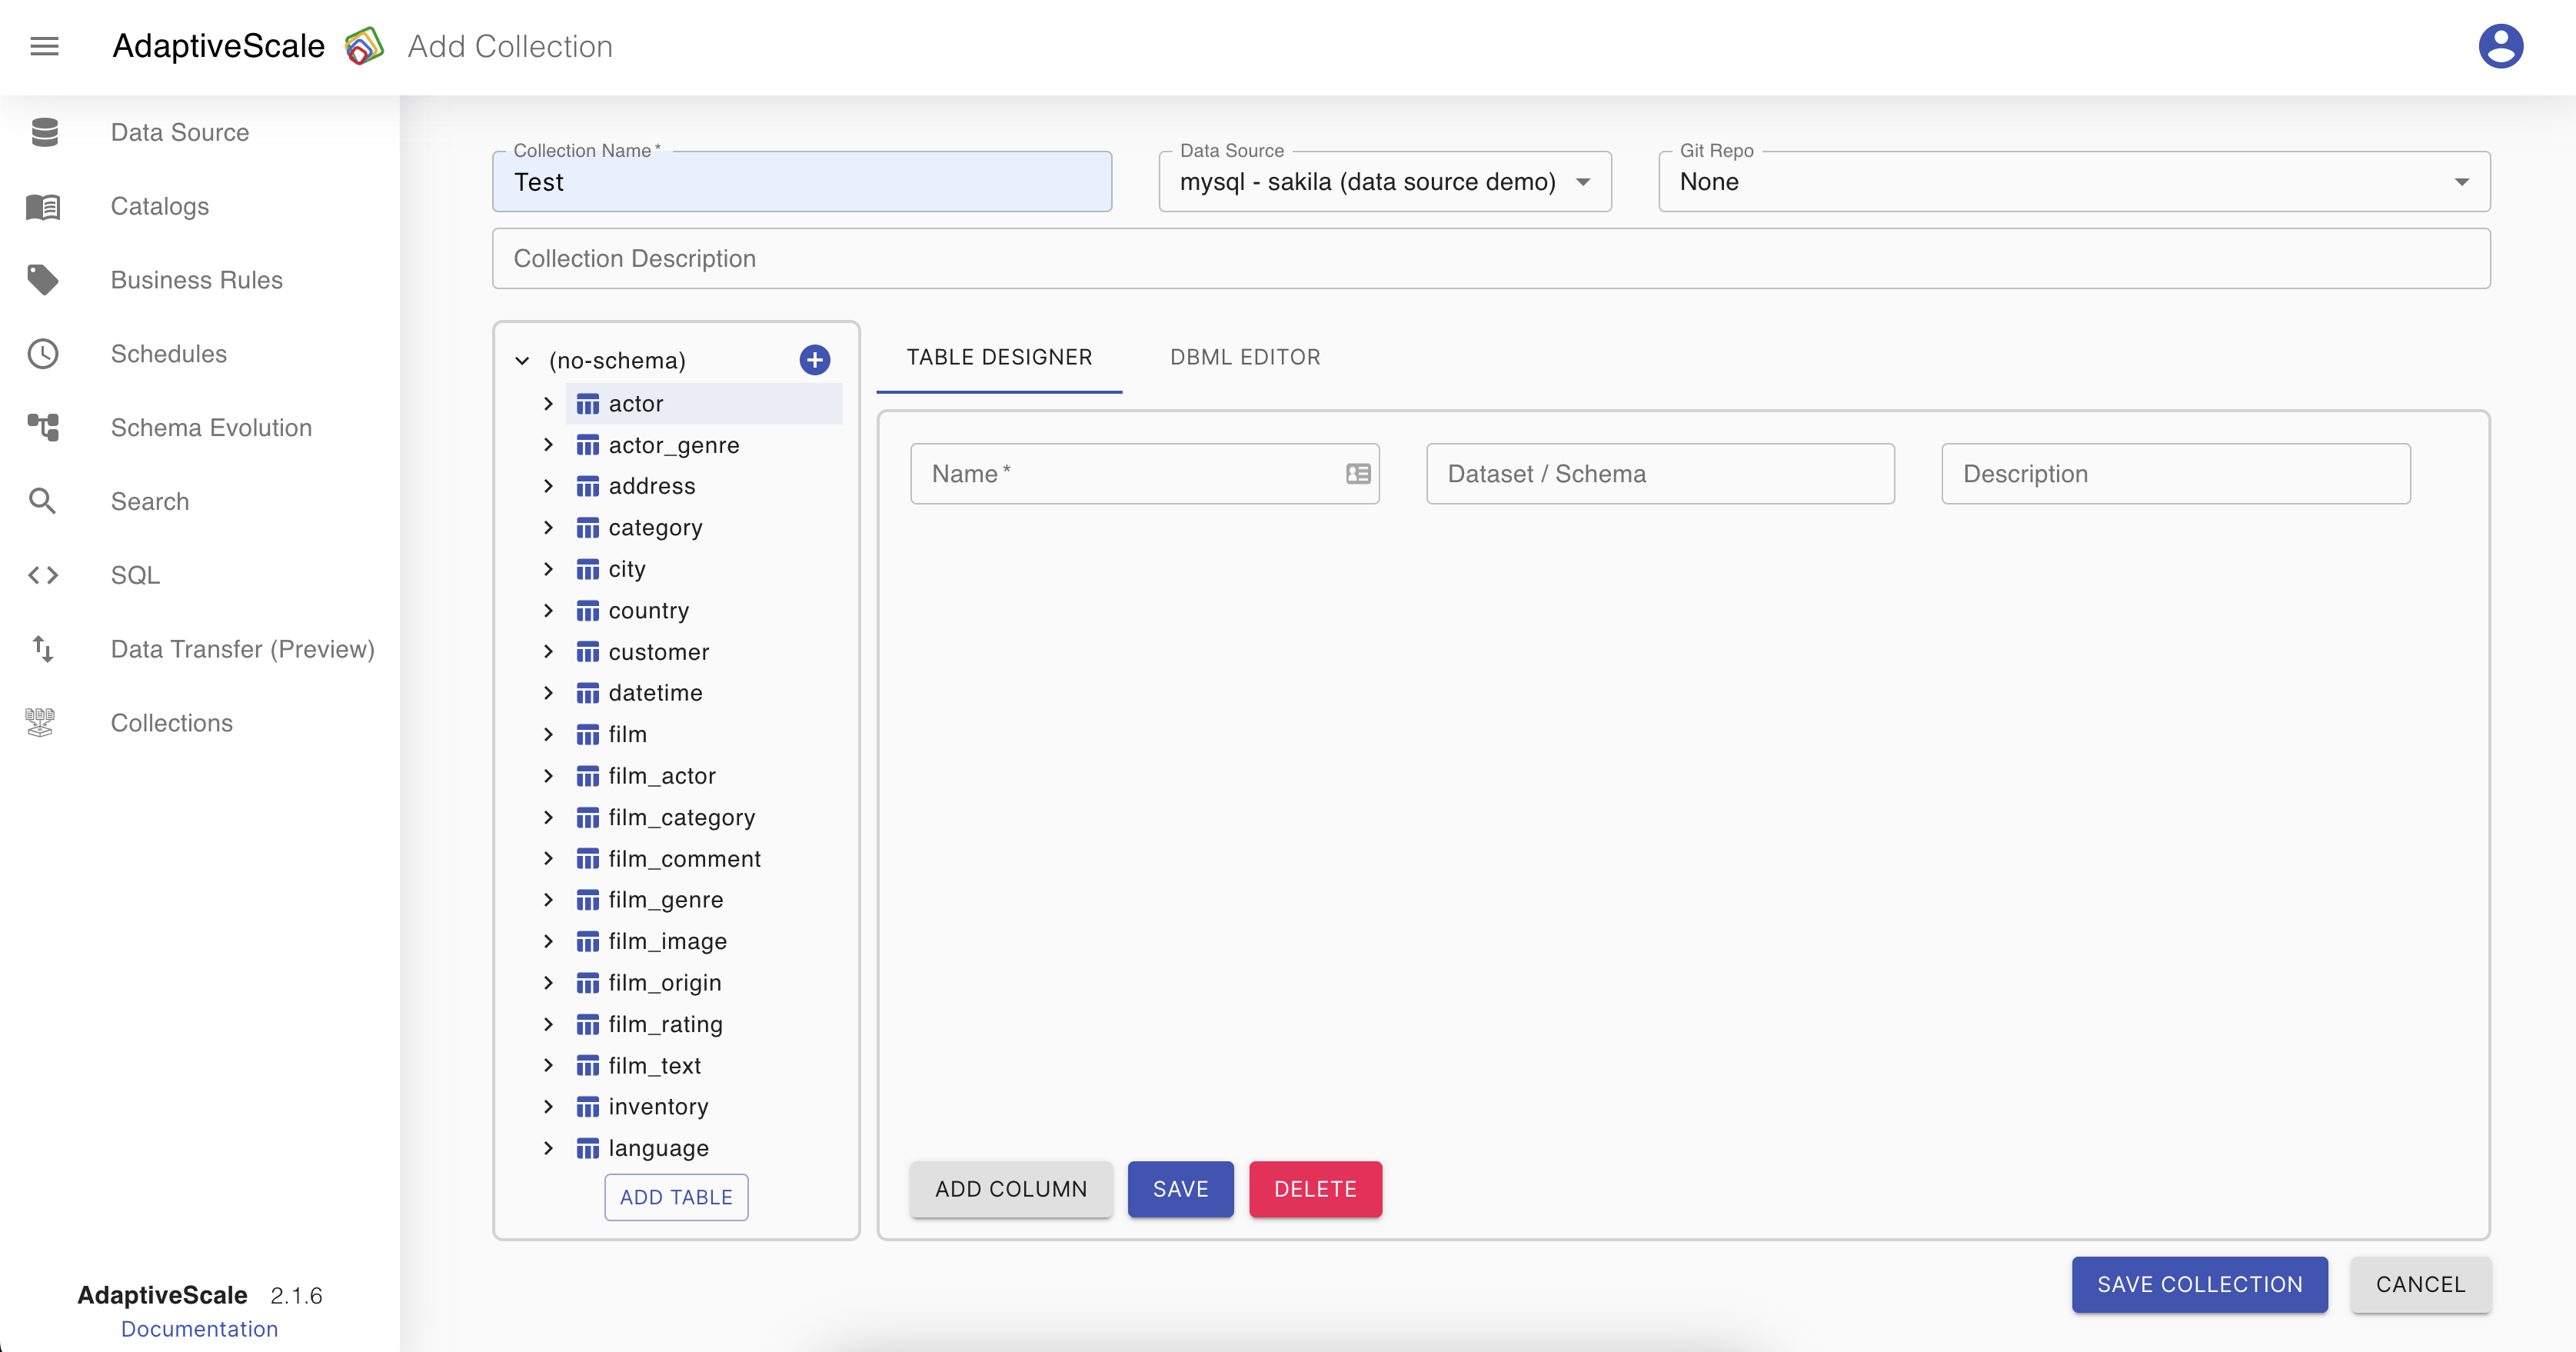
When Collection screen is opened, the user must fill a collection name that should be unique, choose a data source connection if it wants to modify an existing one or choose a DMBS type to create a new one, and the tables are filled automatically.

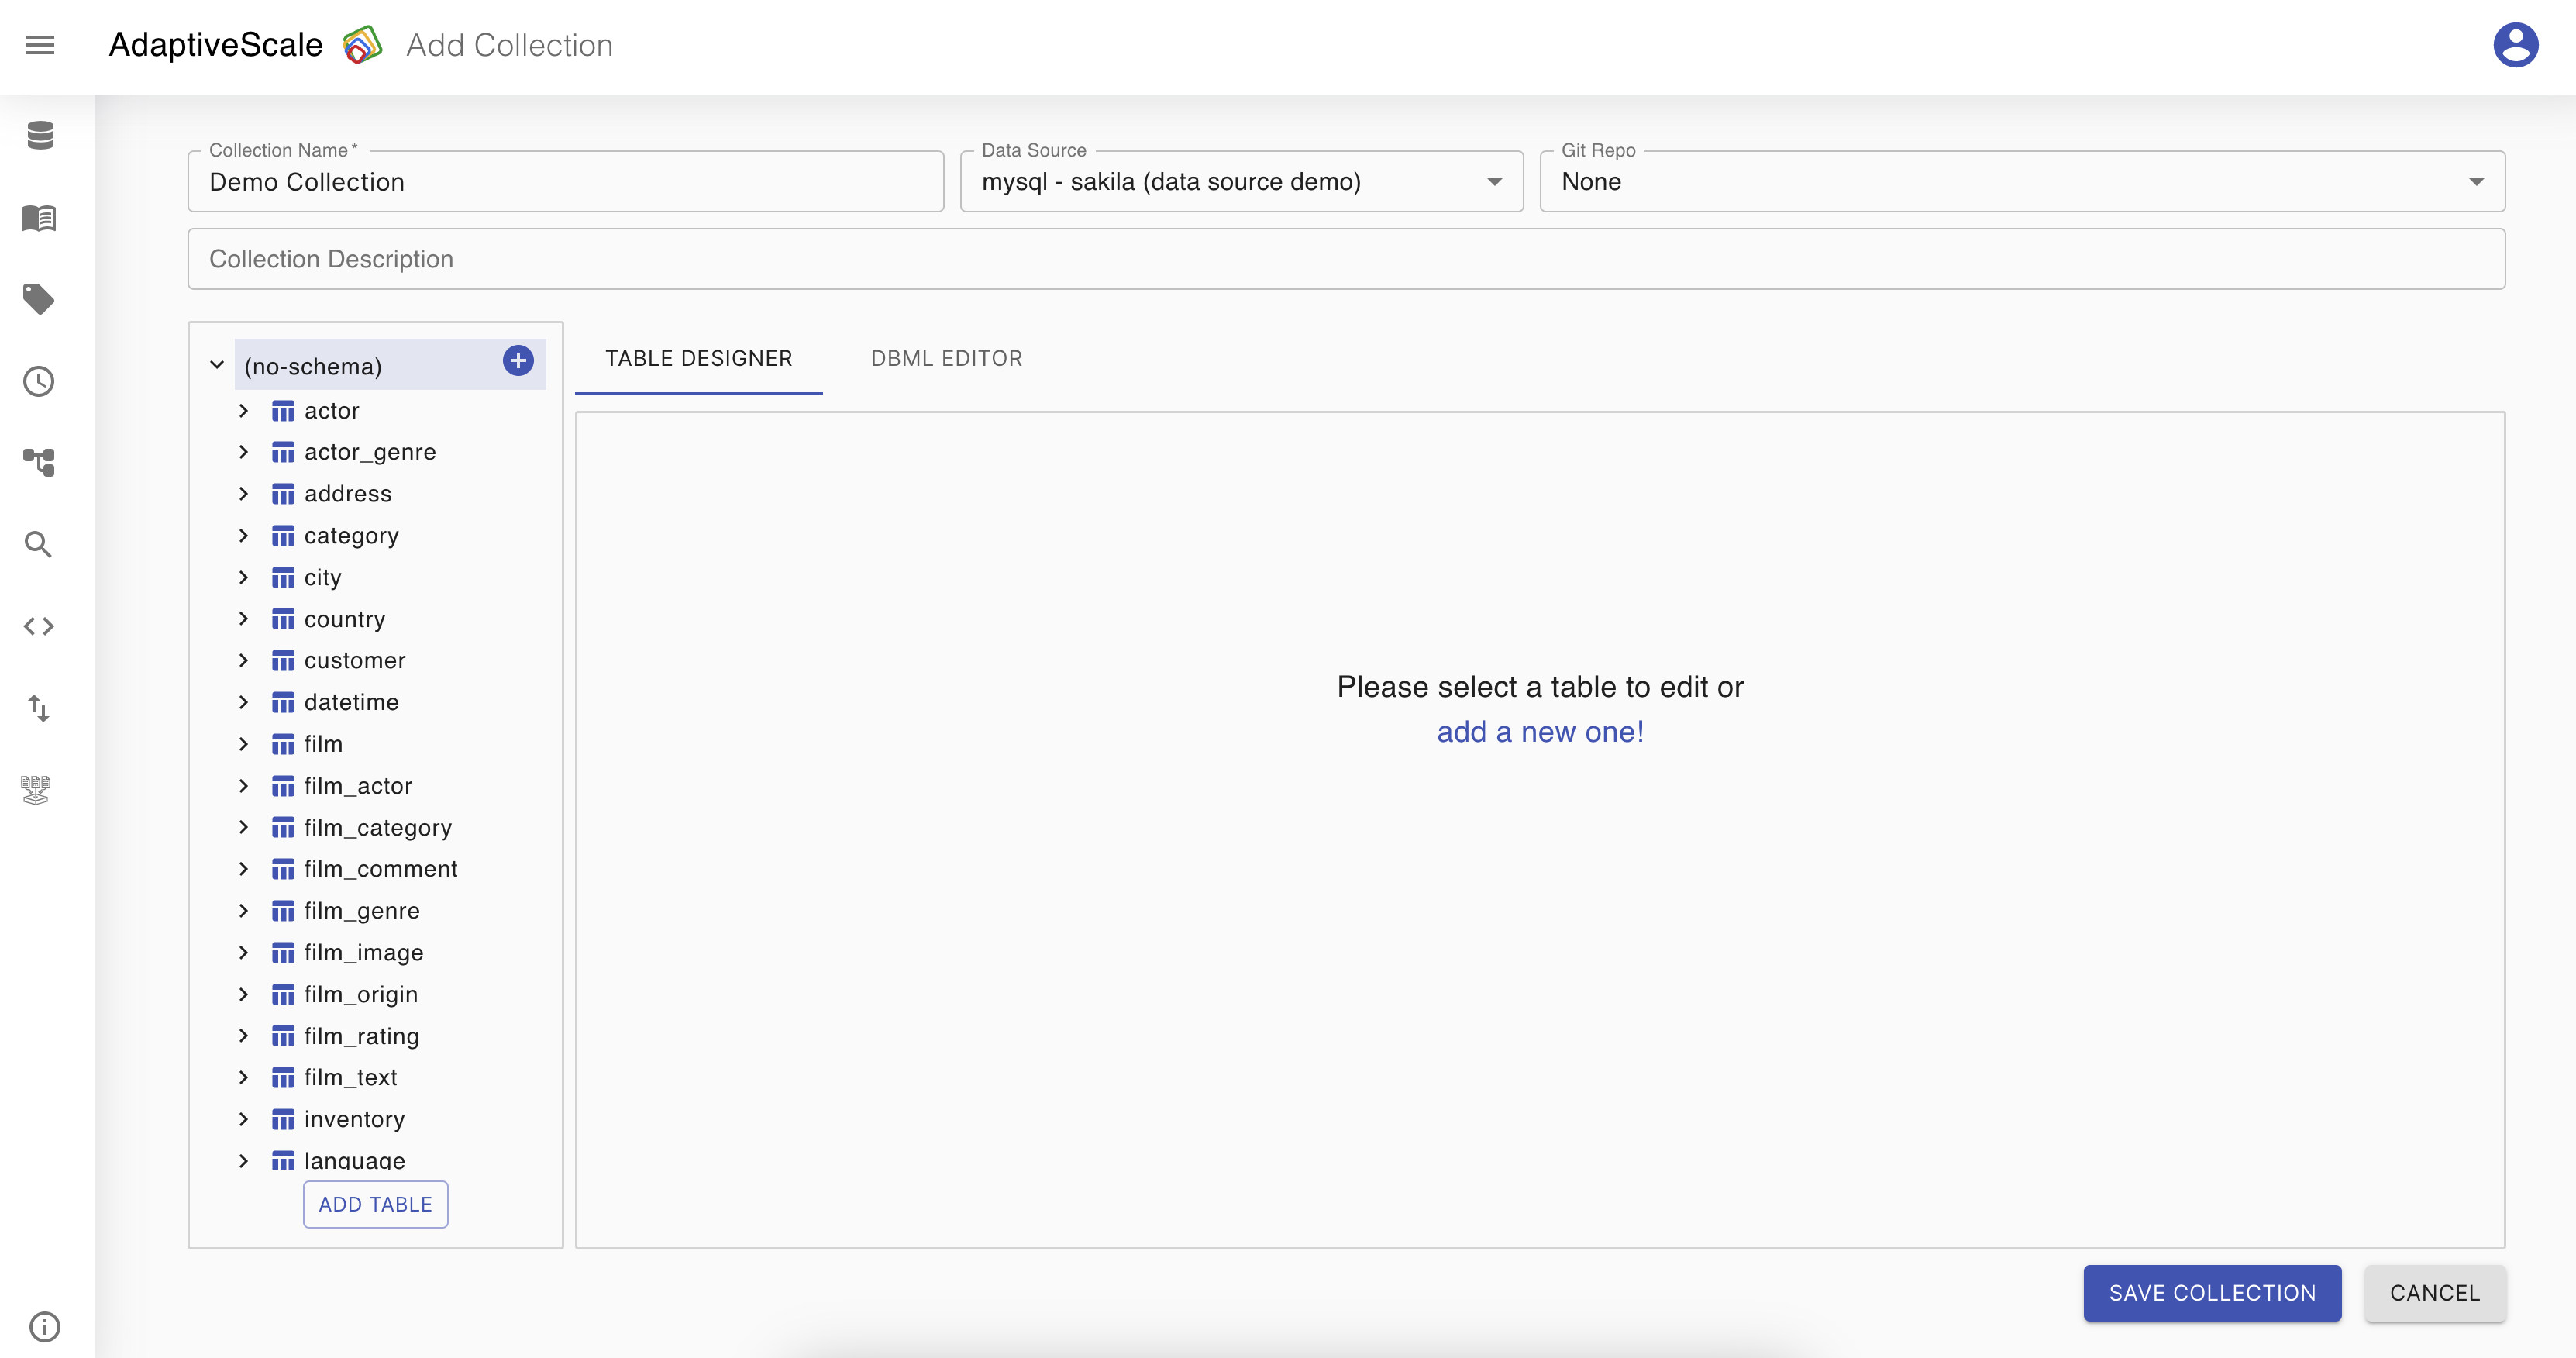
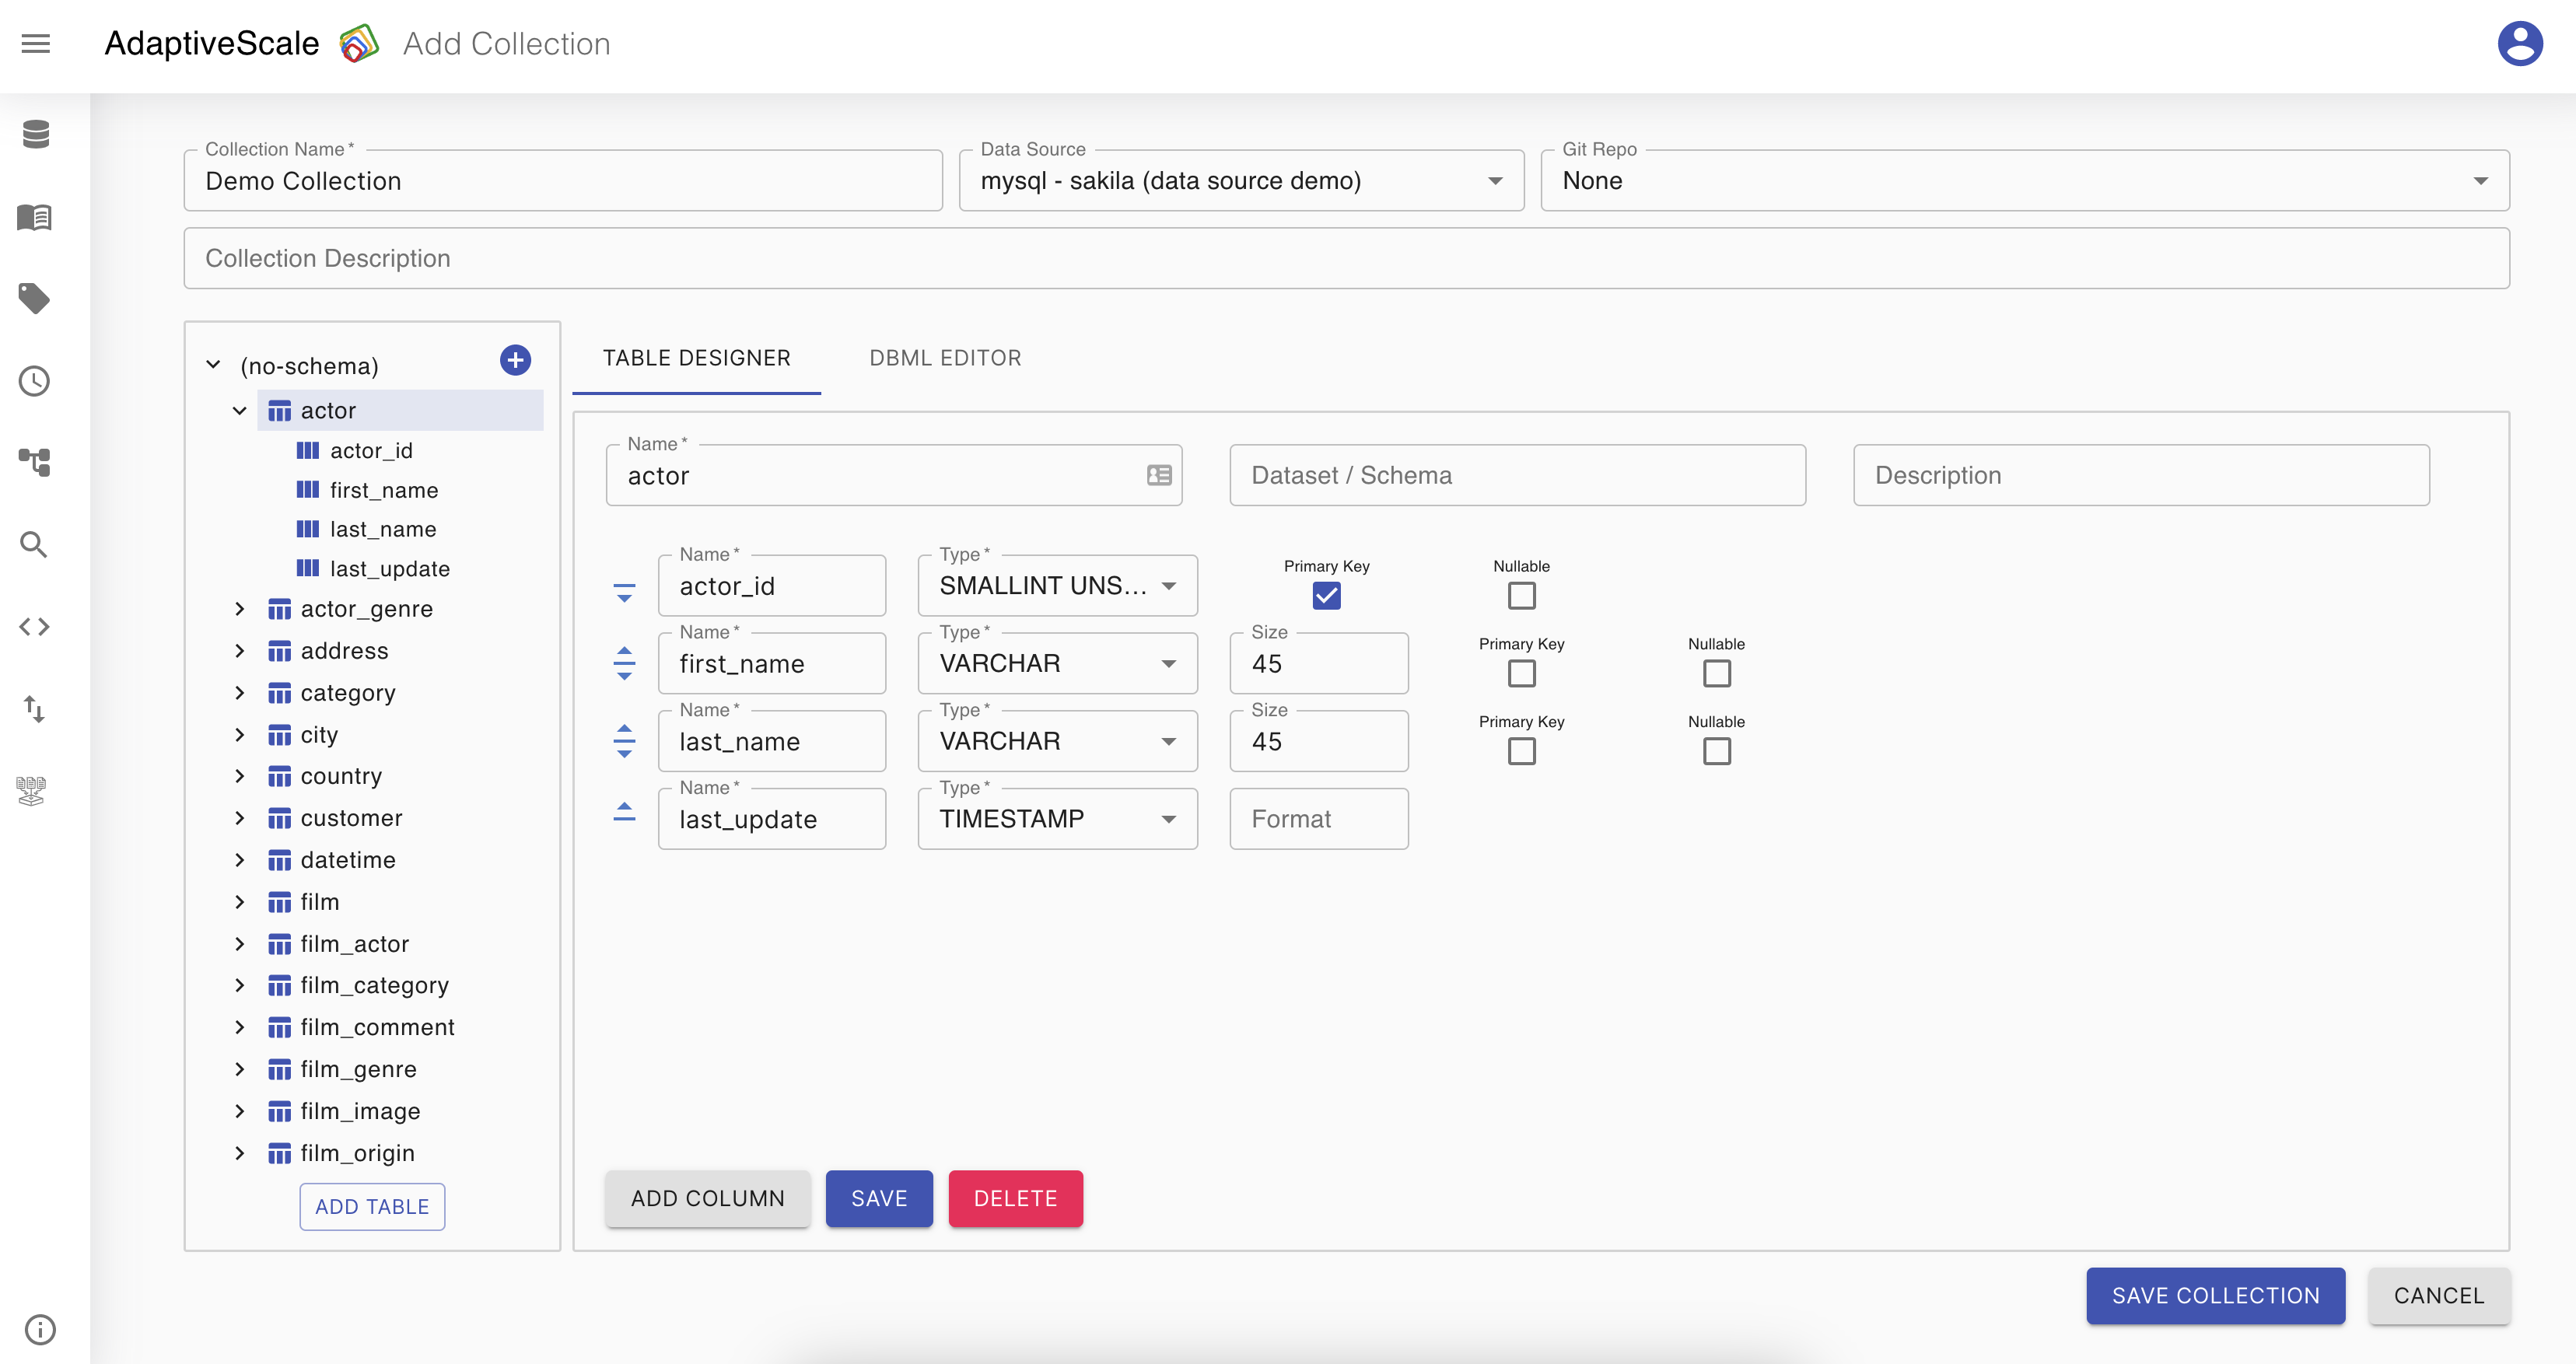
In the tables section, tables are represented as a tree view, where the user can see the table and columns names. A new table can be created as well. When one of the tables is selected the Table Designer section is visible with all the detail of the selected table such as the columns it contains, their types, the primary key and nullable columns. These details can be changed or deleted by the user. Also it is possible to add new columns and change the schema.
Add a column
If the user wants to restructure the table it can add a column to the desired table by clicking on the table first and then click on Add Column on the Table designer.
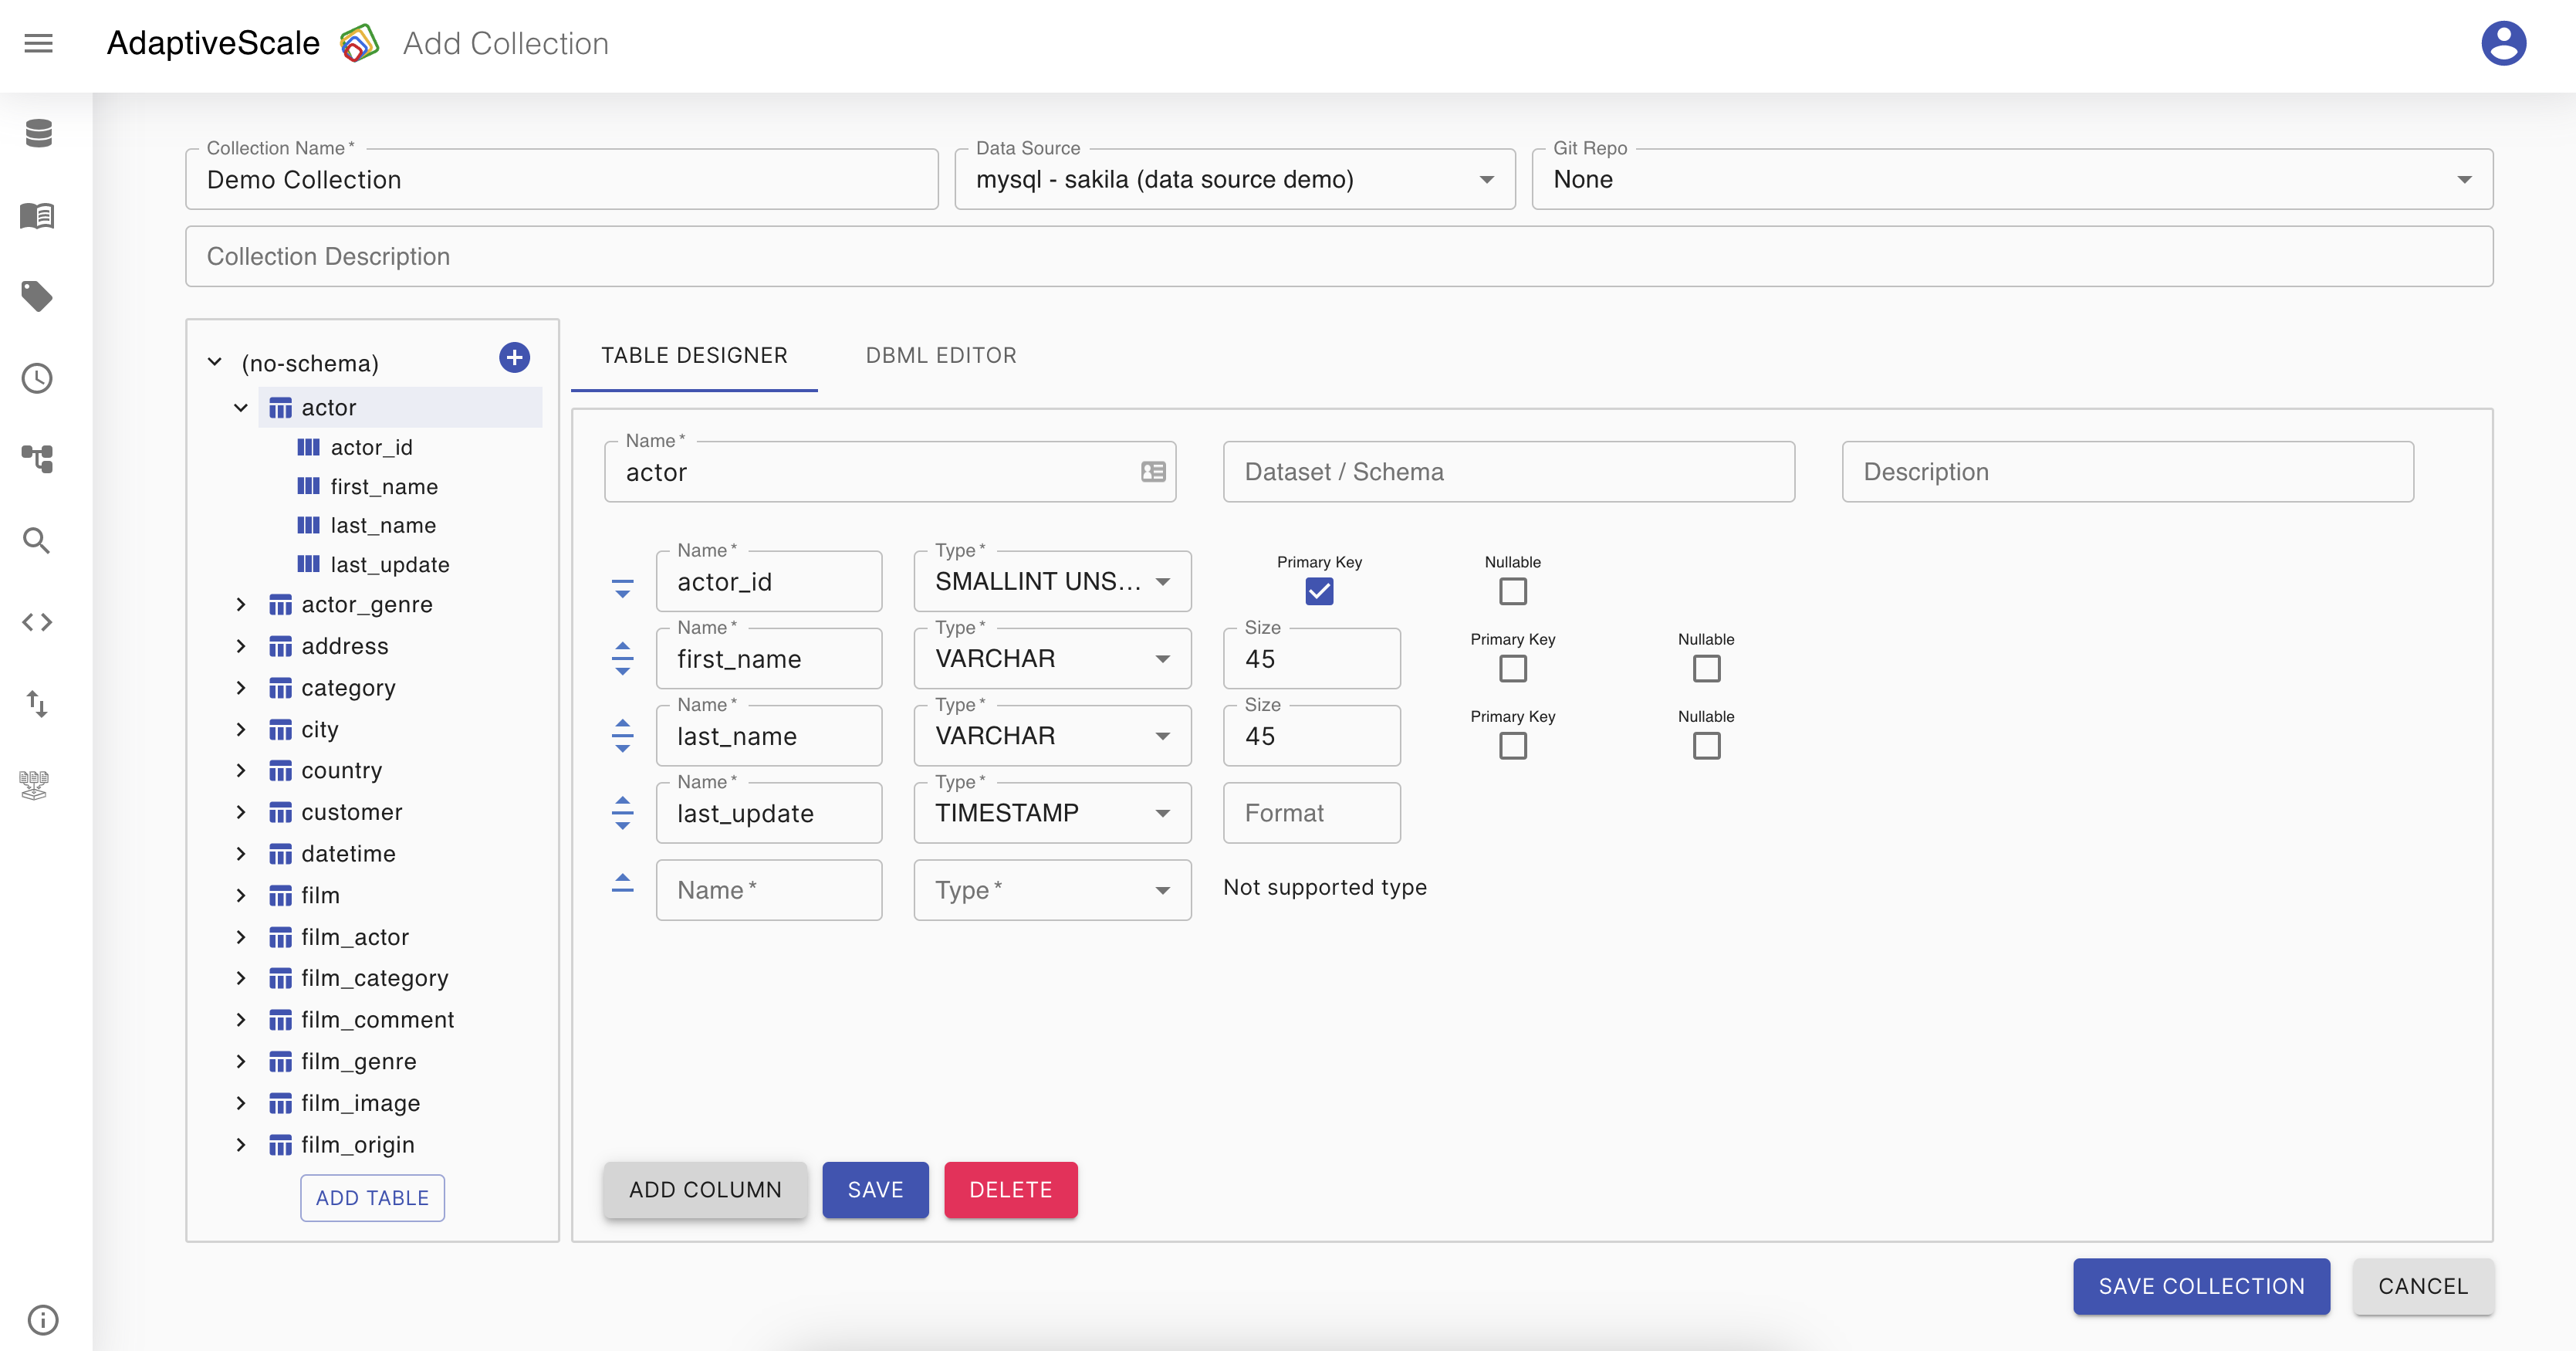
For a new column, the user should provide a name and a type, a size and coonfigure a feature such as nullable or primary key.
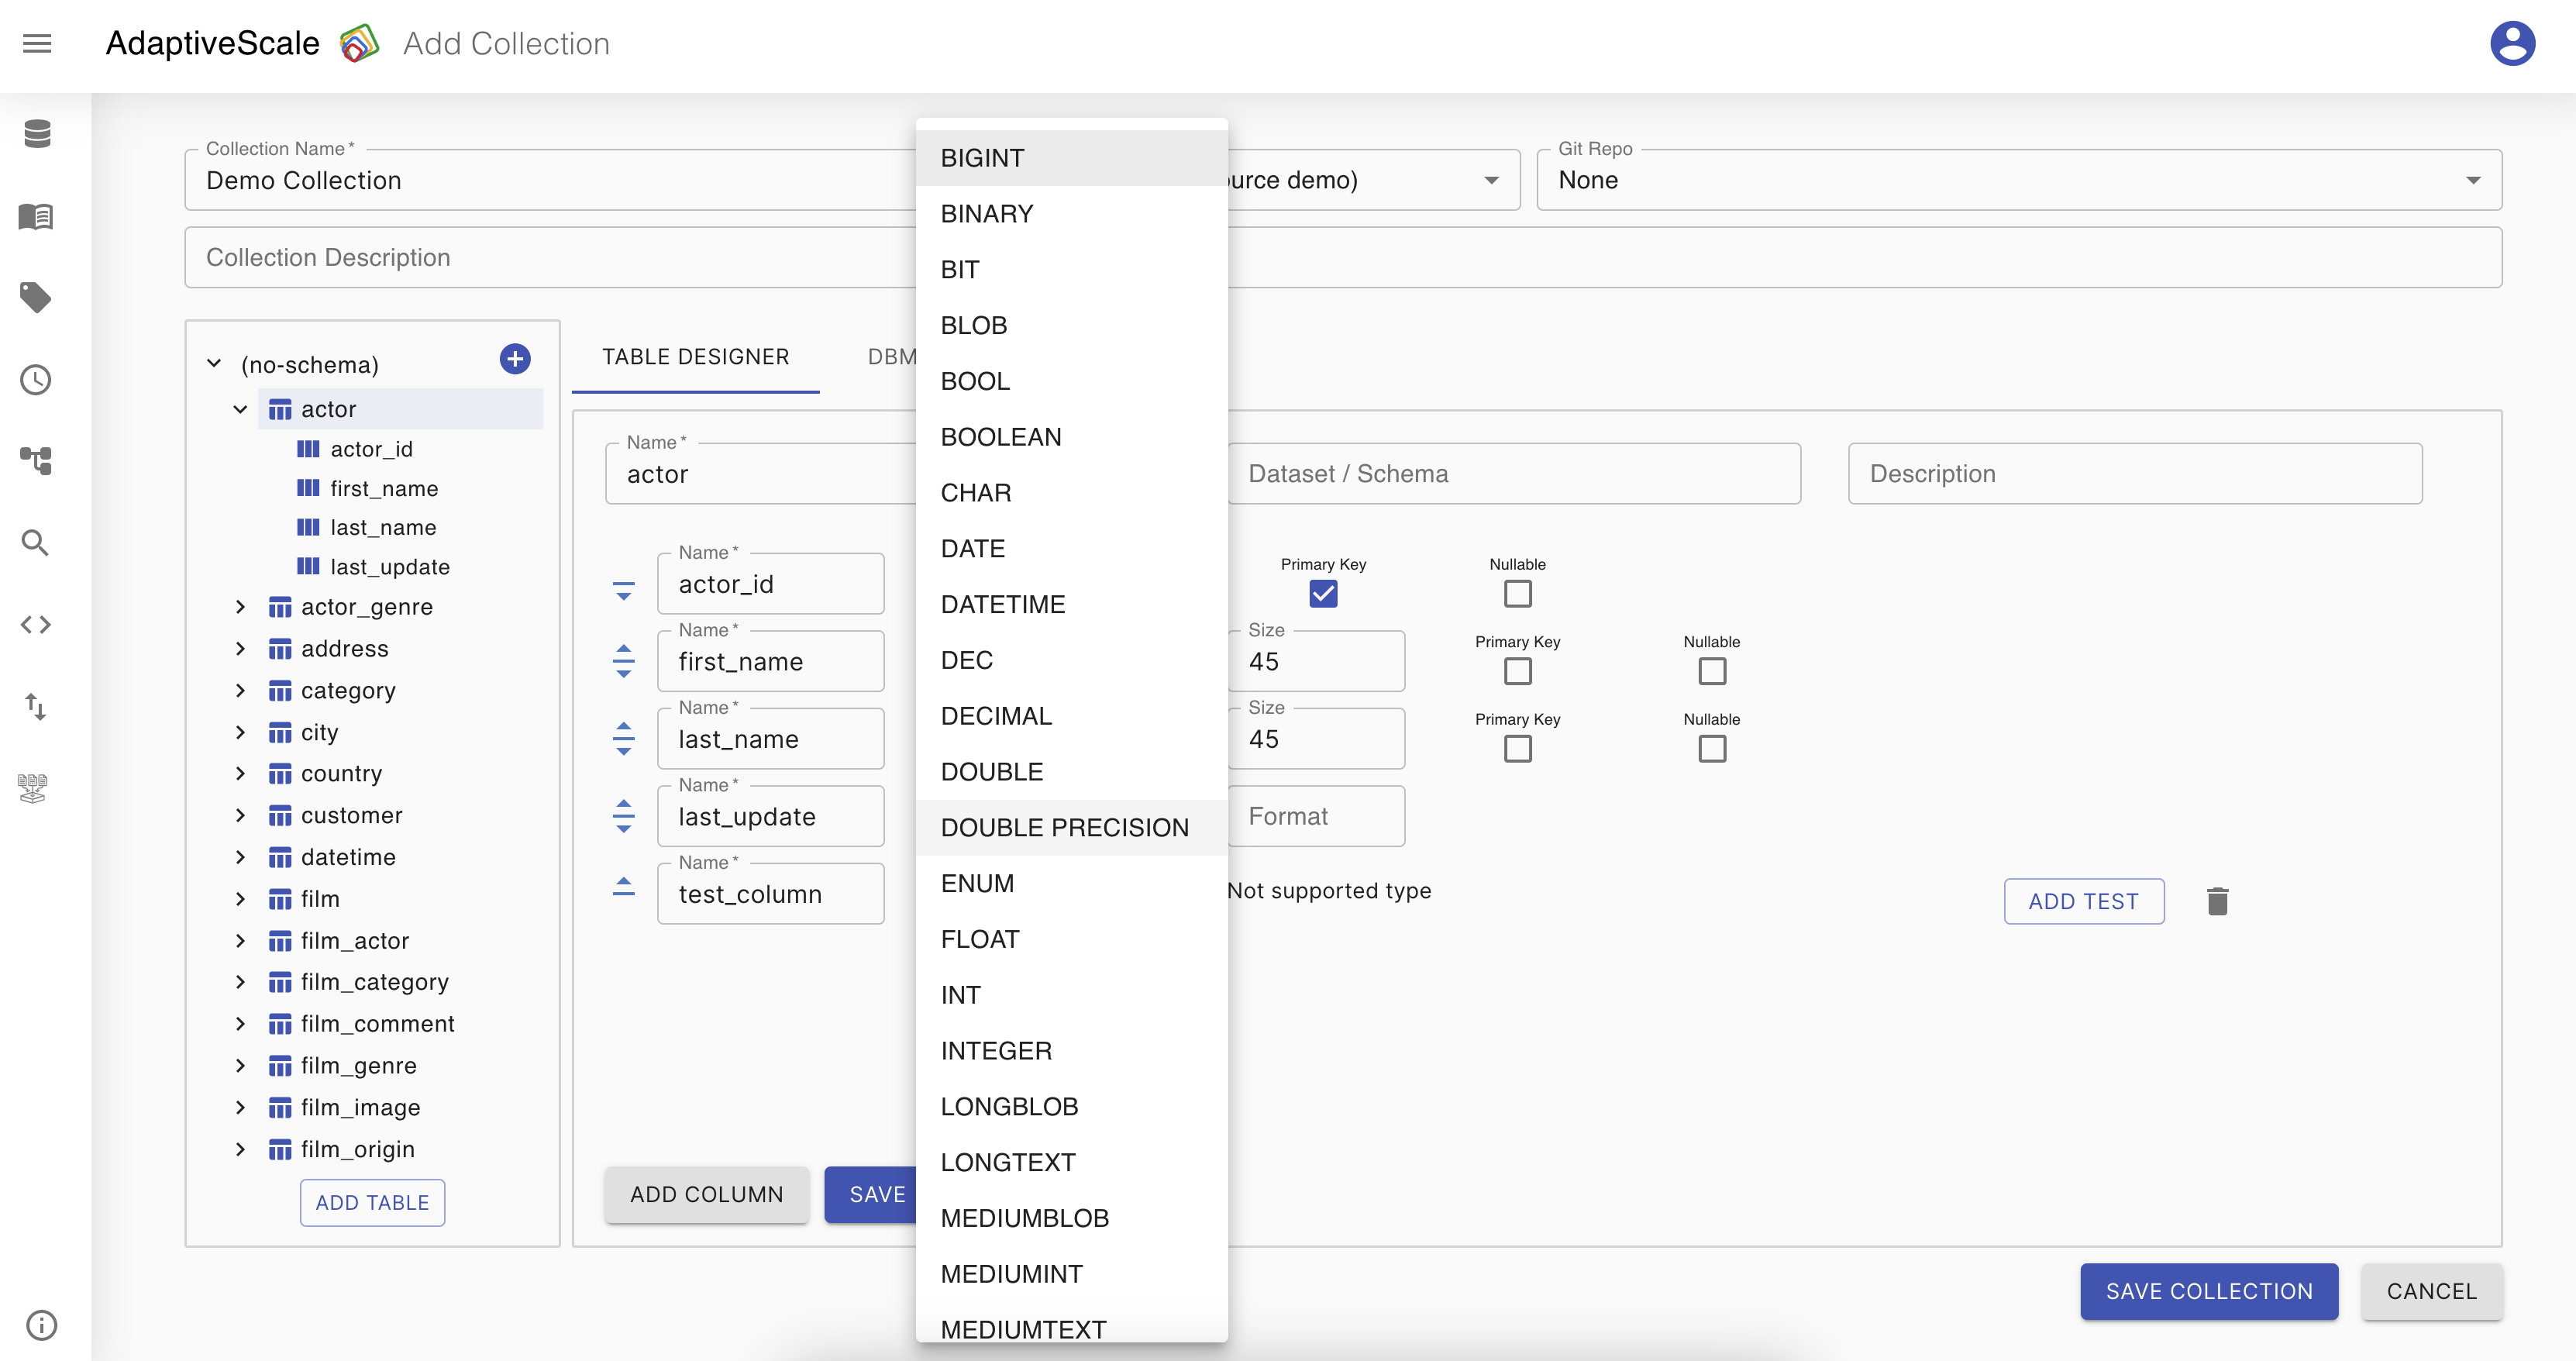

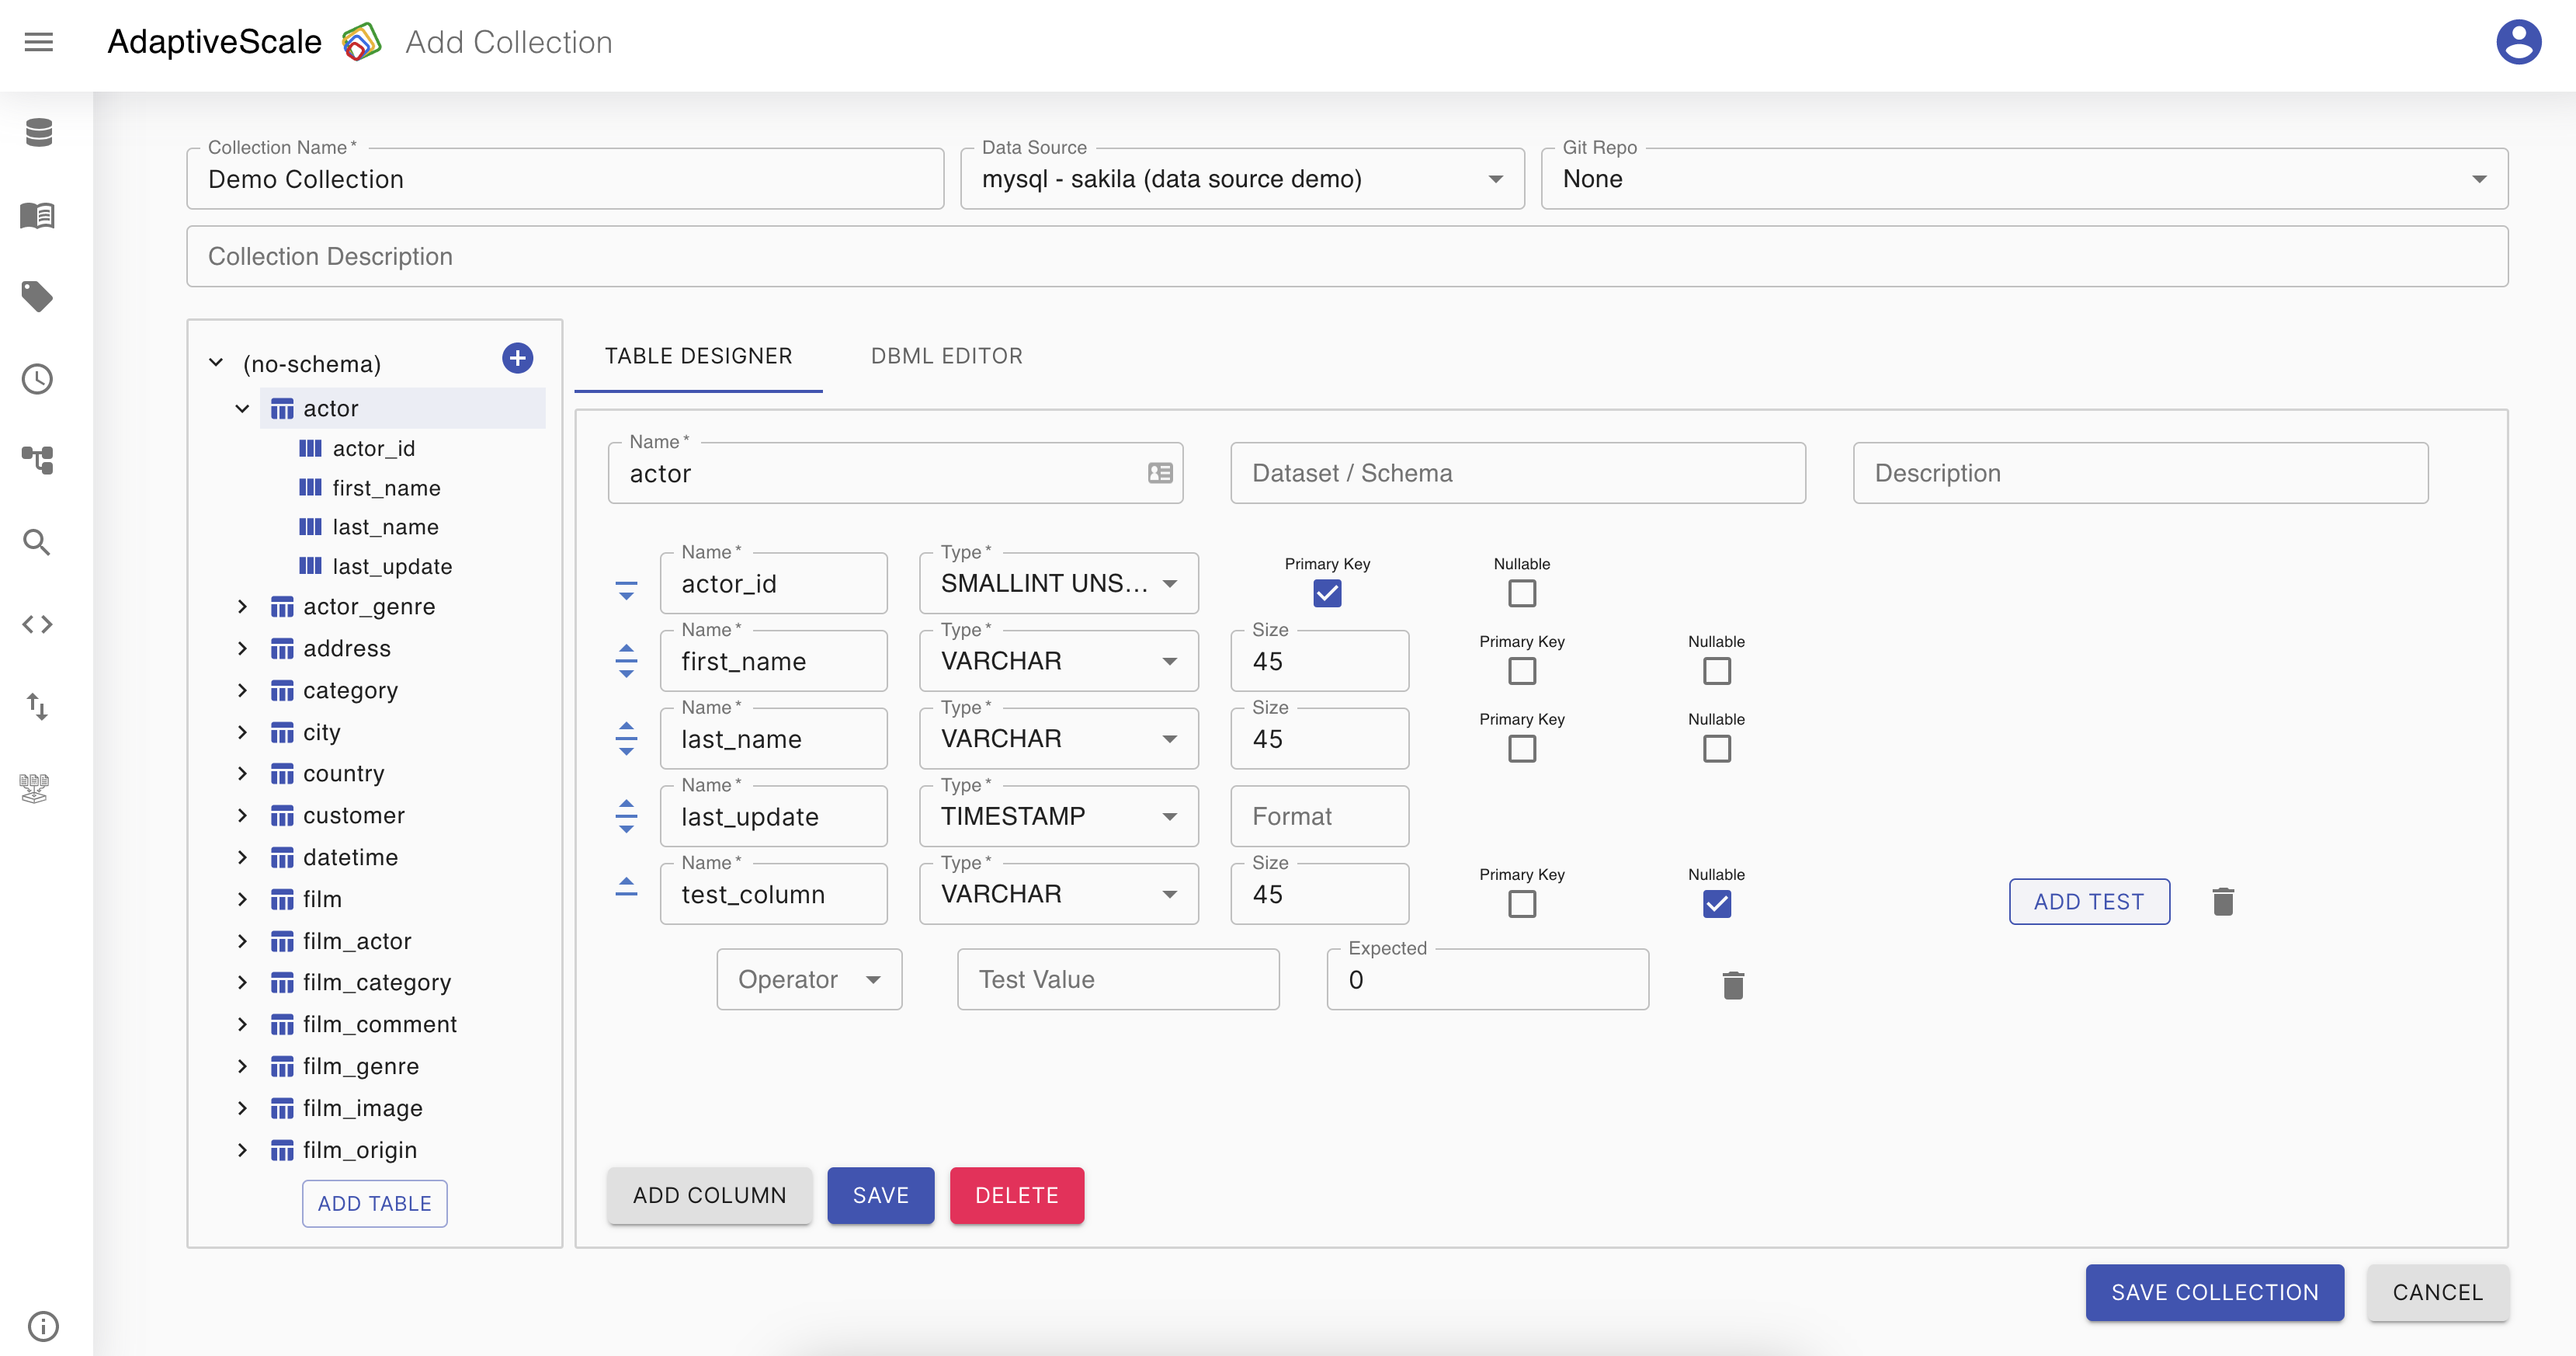
Add a test to a column
More to add to a column will be a test with an operator. To add a test the user must hover over the column and Add Test button will be shown. By clicking on this button a new test will be added, so the user can choose an operator and a value to be compared to.

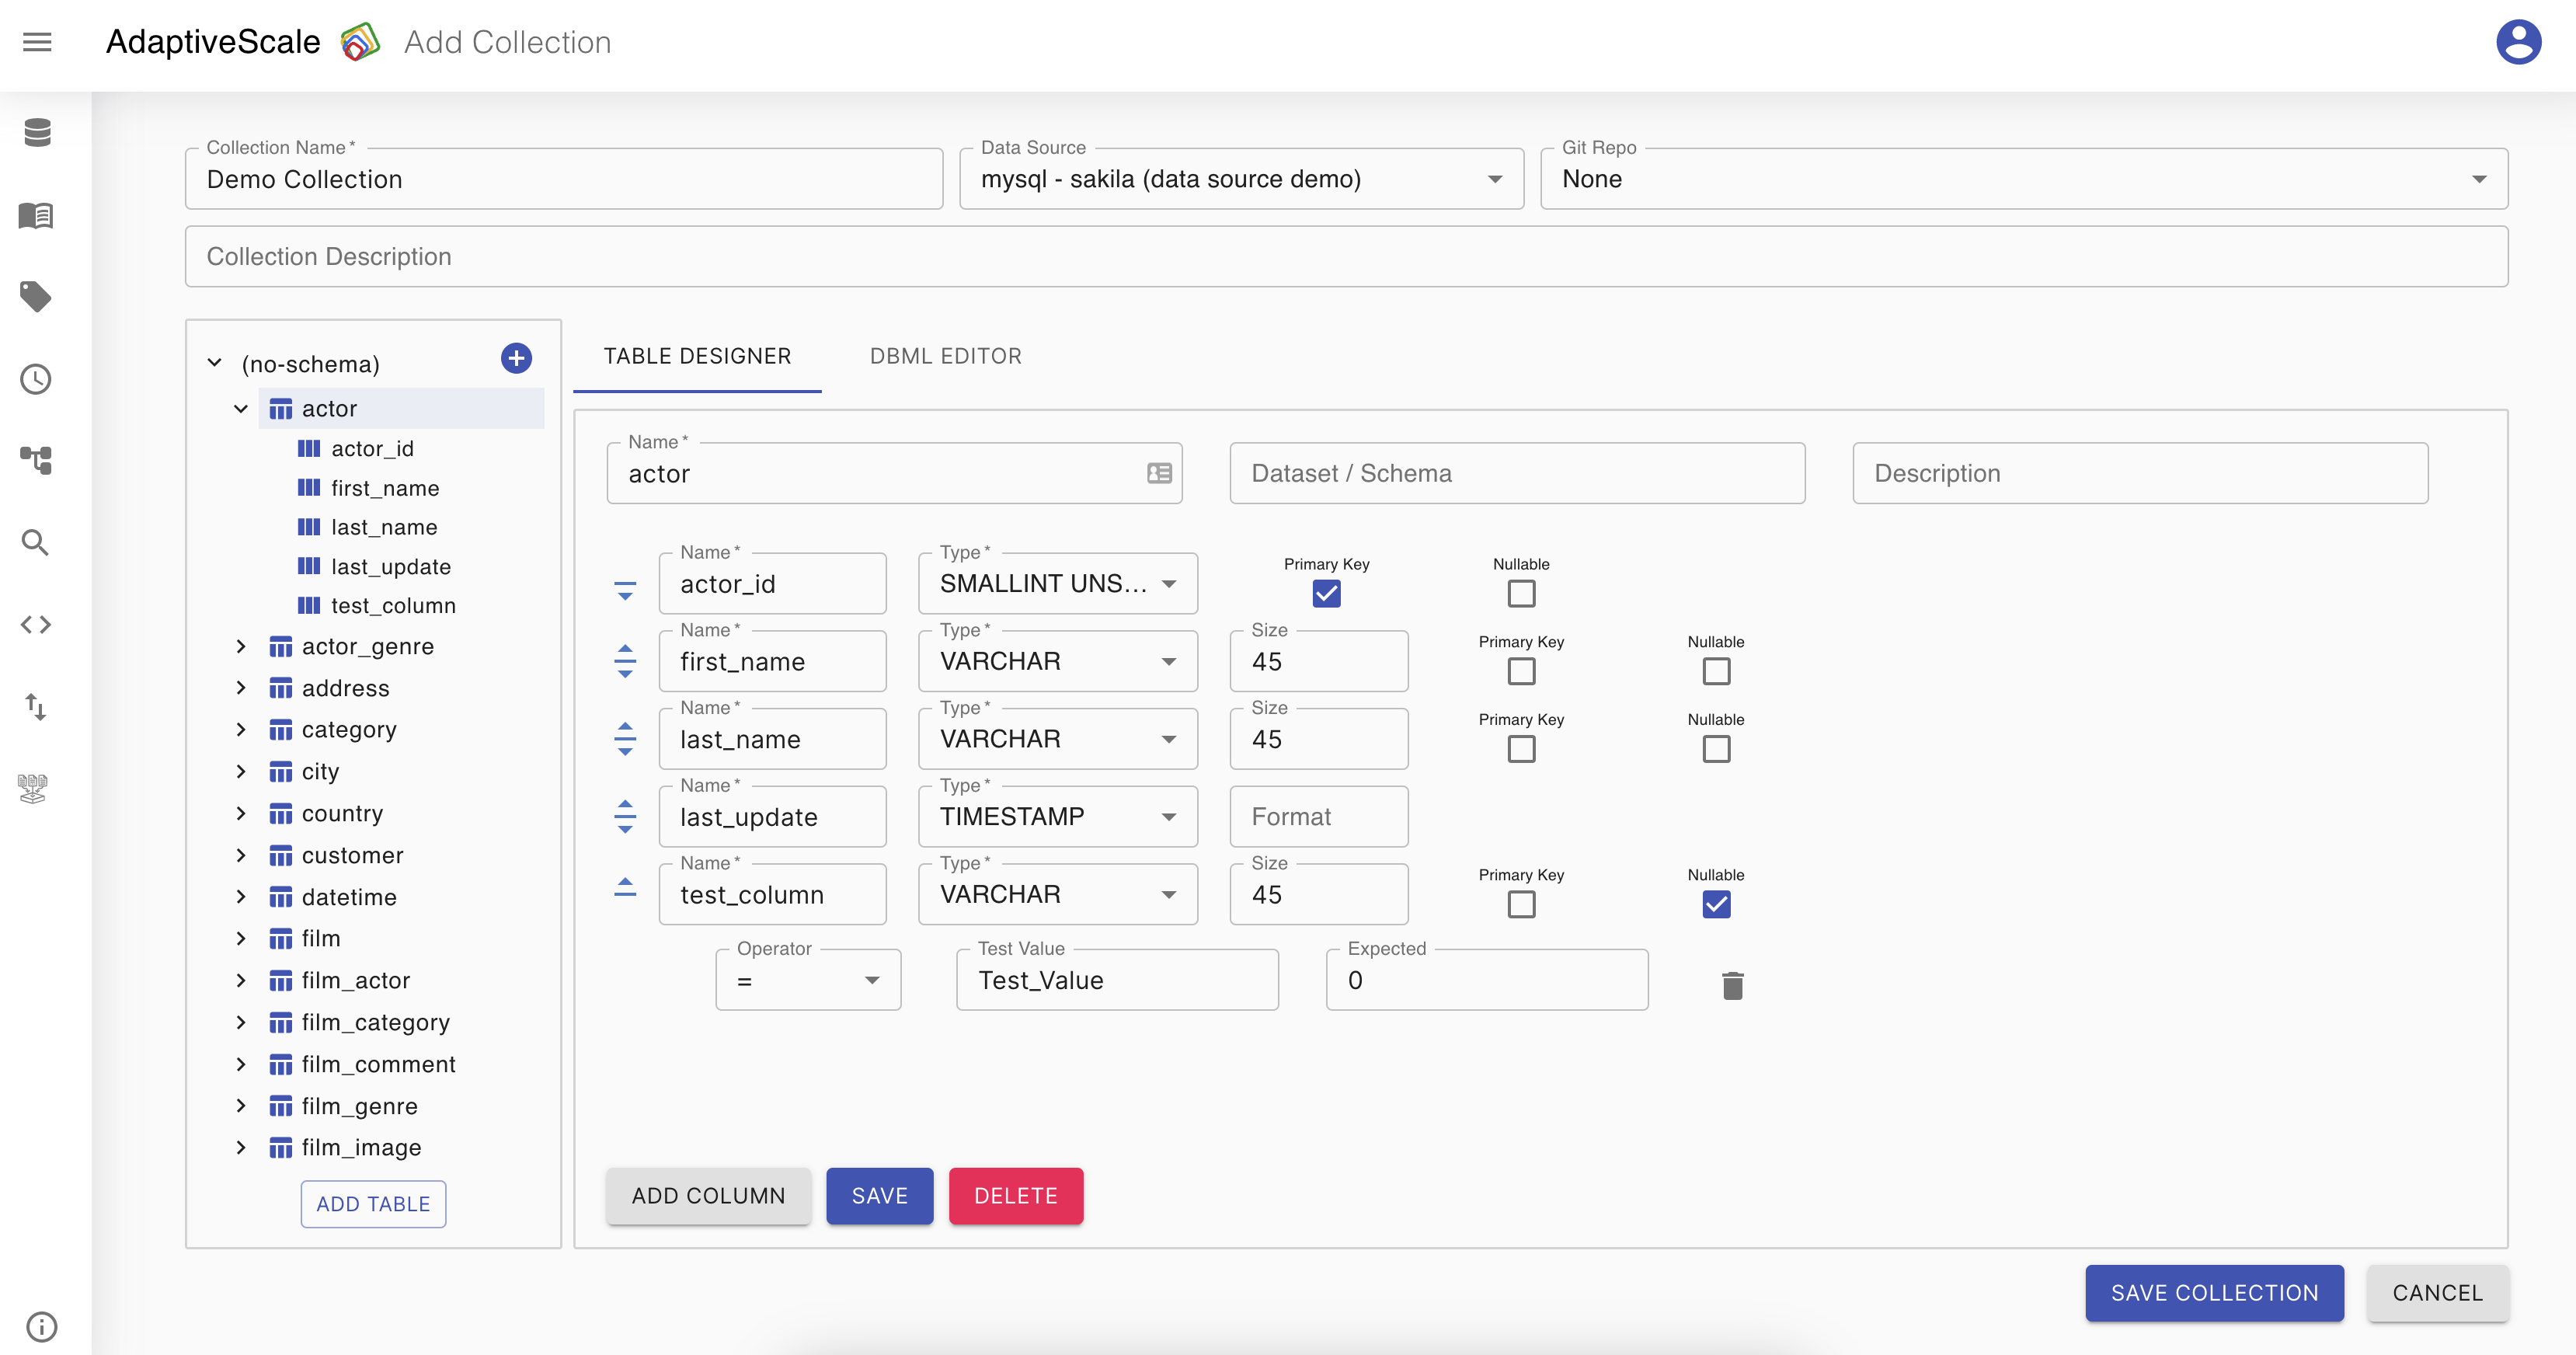
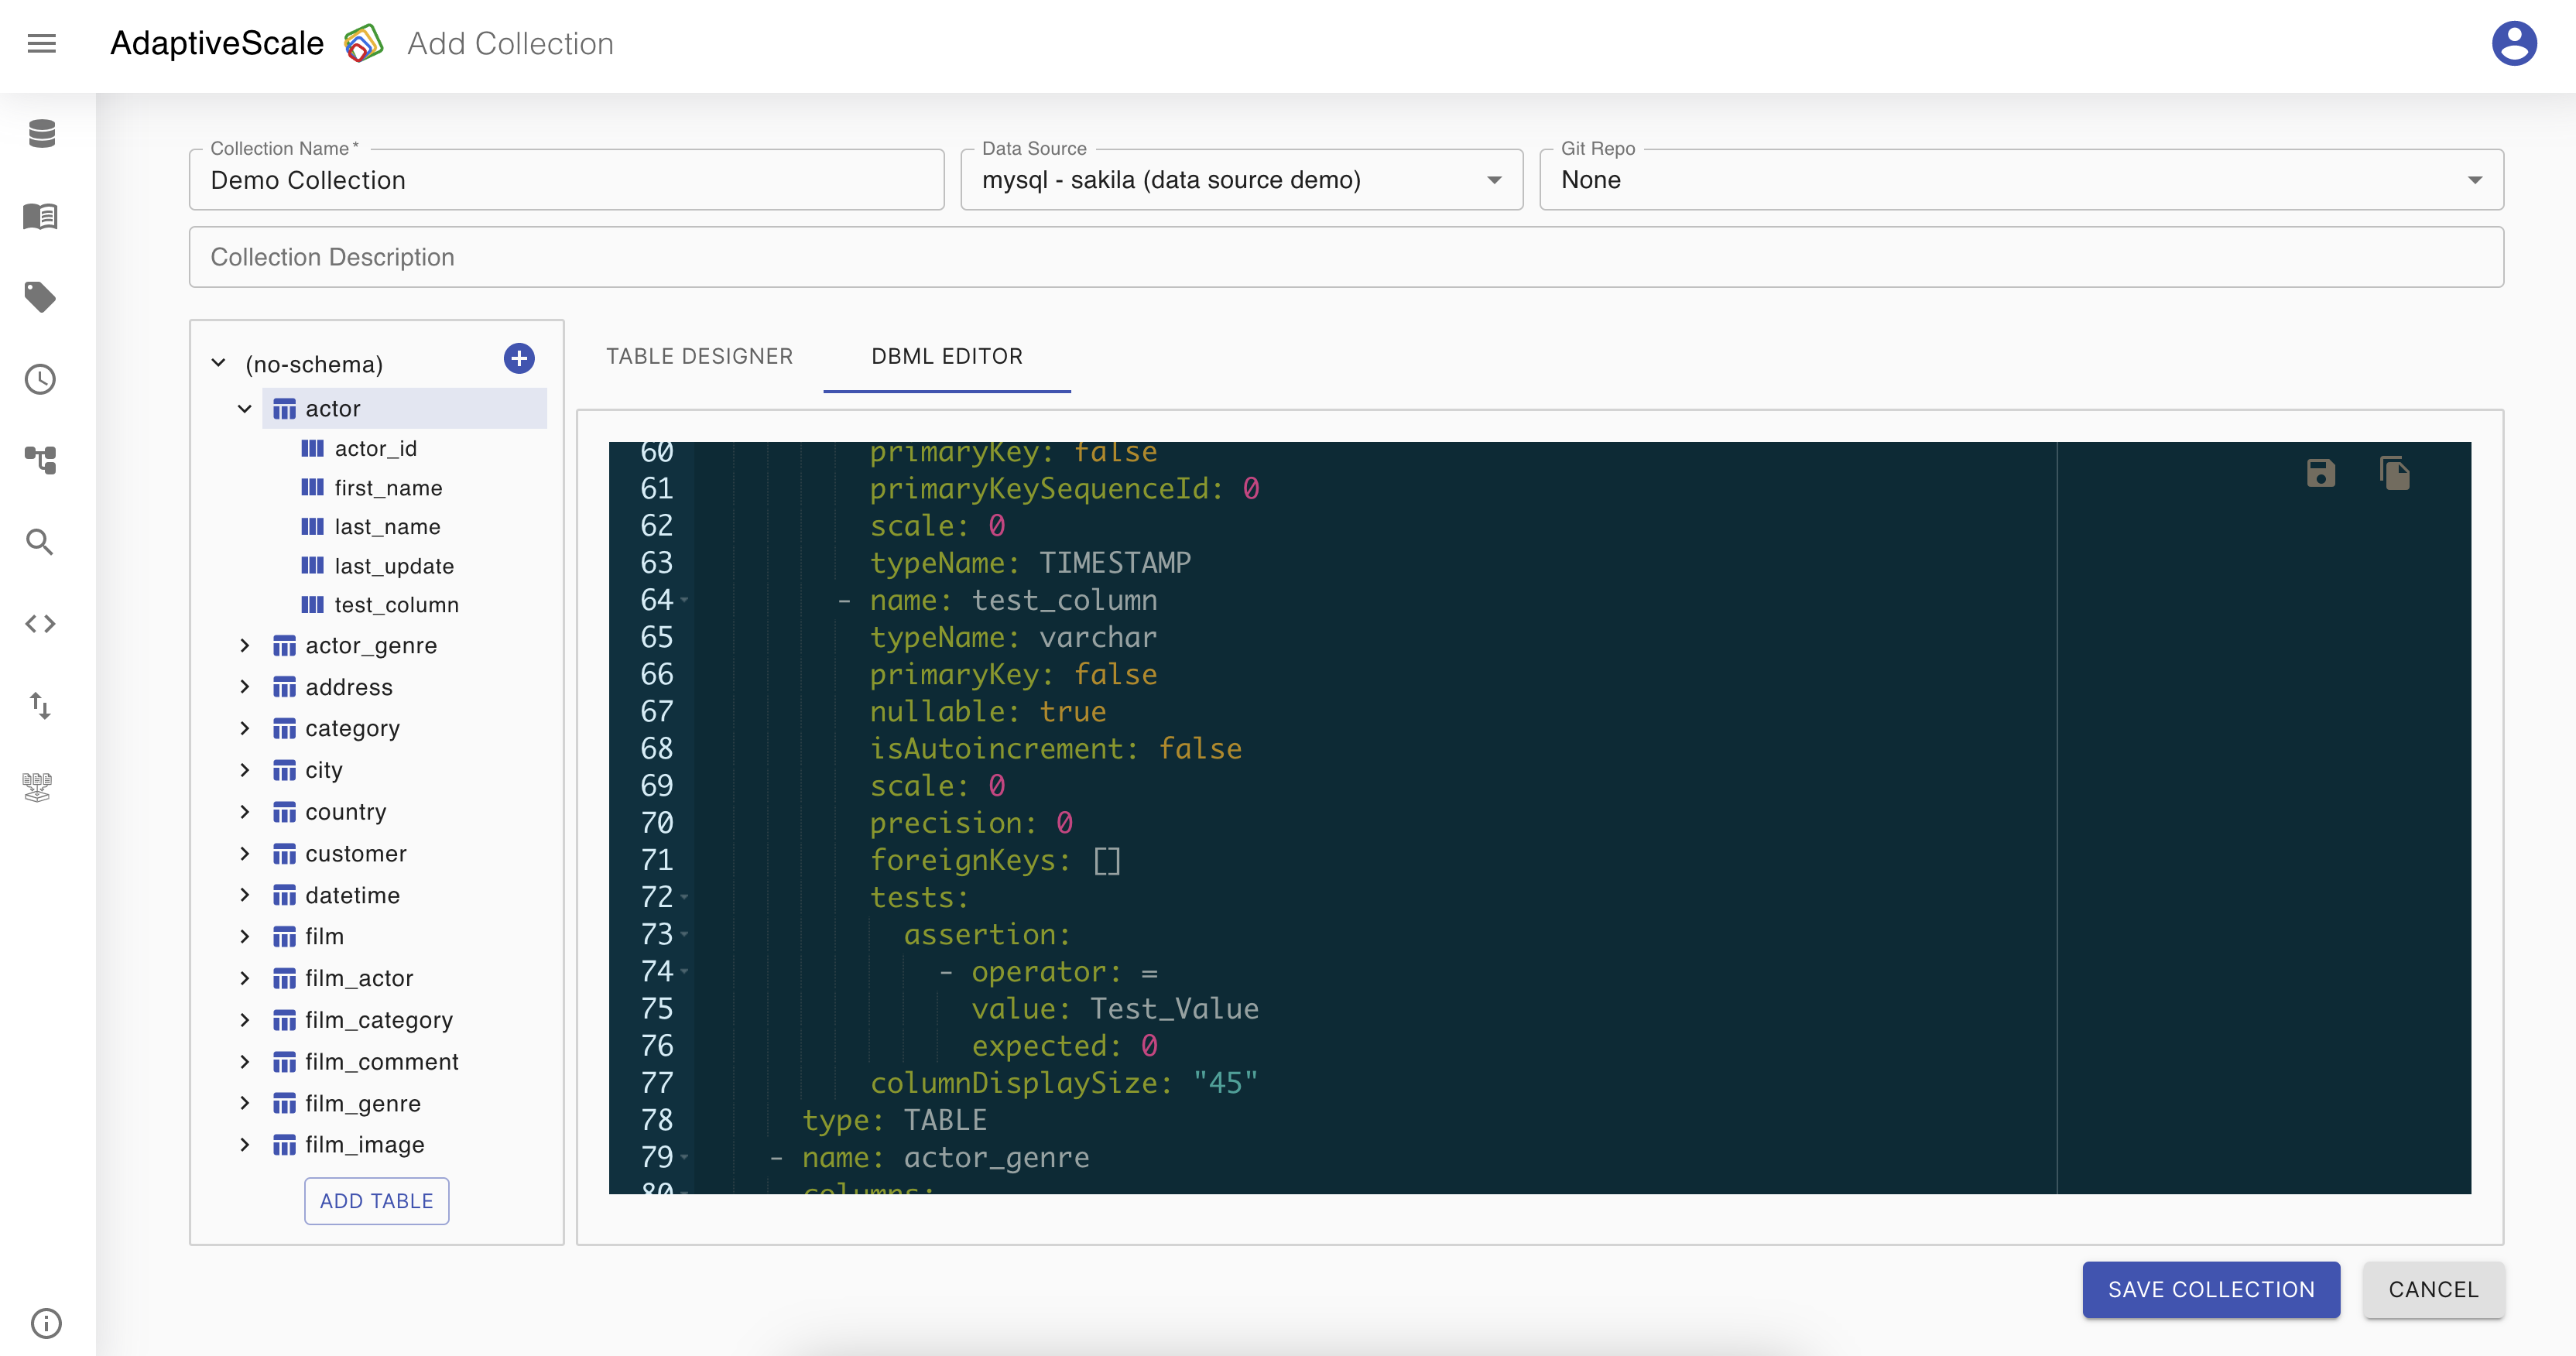
To save the changes the user must click on Save button. This will also be changed on DMBL Editor's yaml file.
Add a table
Another feature of Collections is the possibility to add a new table to the schema by clicking on Add Table button. On Table Designer the user should give a unique name to the table and continue adding columns as described above by clicking on Add Column button.
After the user is ready with setting a collection can save it with Save Collection button.
Edit a collection
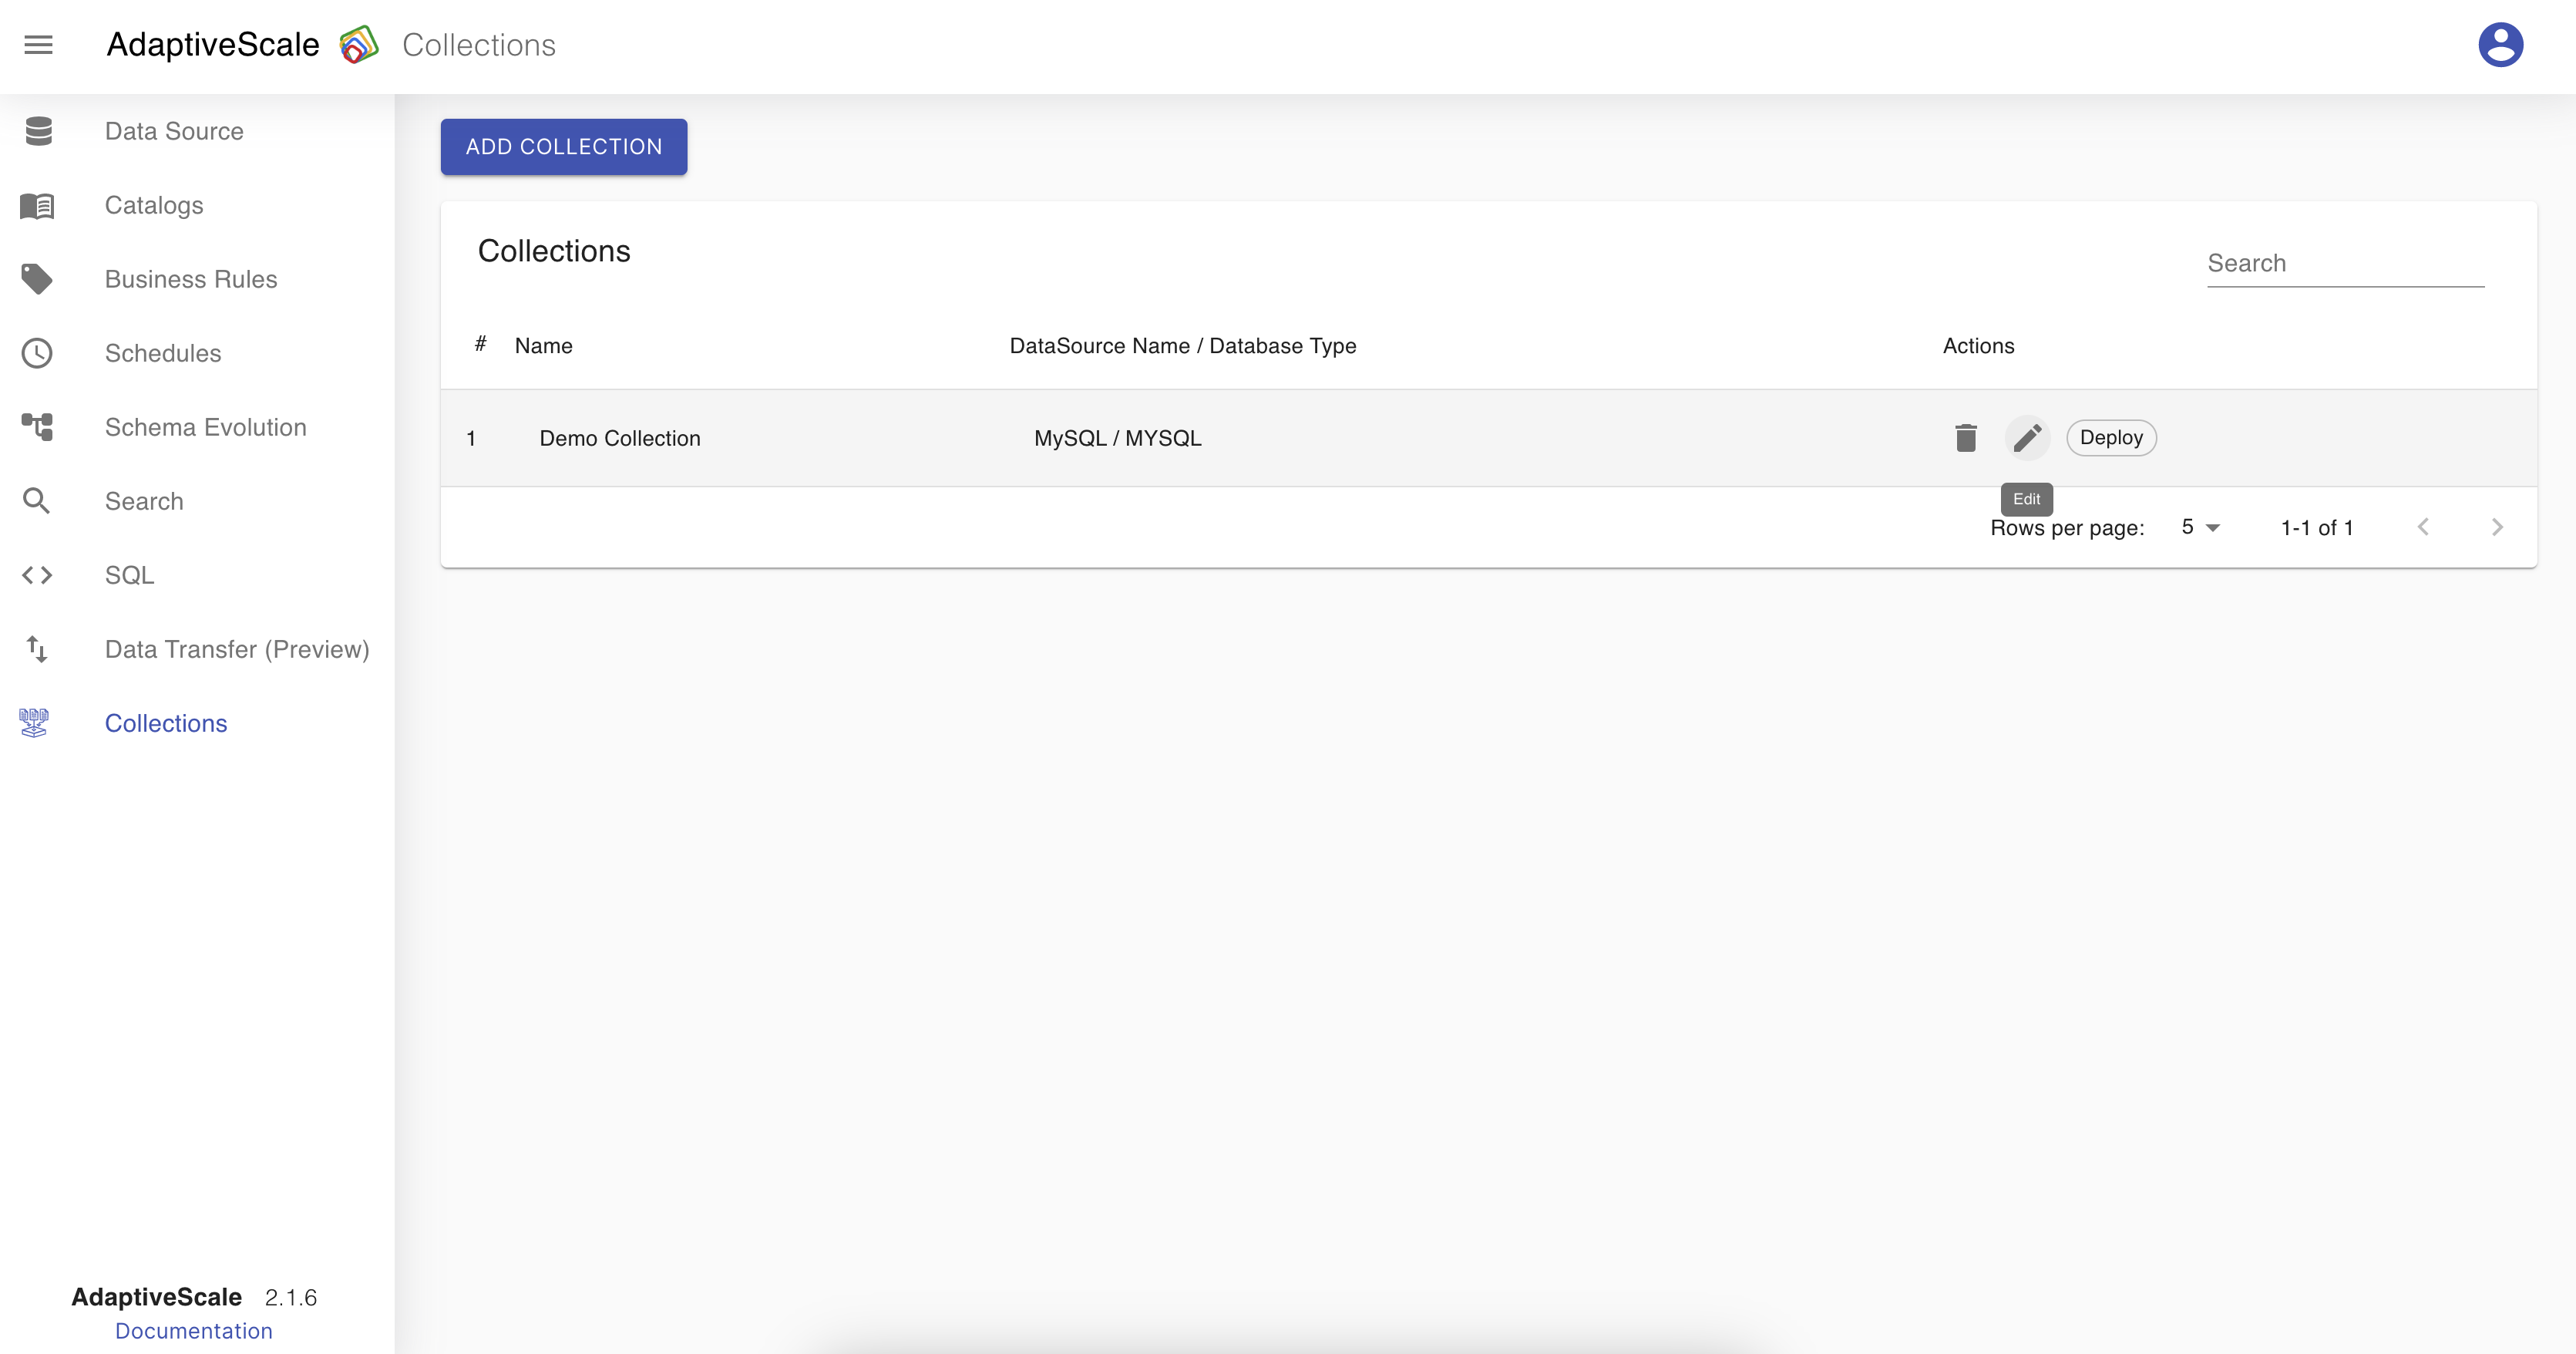
Now that a collection is configured, on Collection tab the user can see a list of the collections and a button Add Collection that redirects to the Collections screen for creating a new one. The collection can be edited, deleted, deployed and searched.

When the user clicks on the pen icon next to the collection from the list they can edit the name, description, add a git repo, add or delete a table, add or delete a column and save the changes.
Delete a collection
The deletion of a collection is done by clicking on the bin icon.

When the icon is clicked, a pop up appears with a question if the user is sure about deleting the collection, and if yes the user clicks Delete and if not clicks Cancel.

Deploy a collection
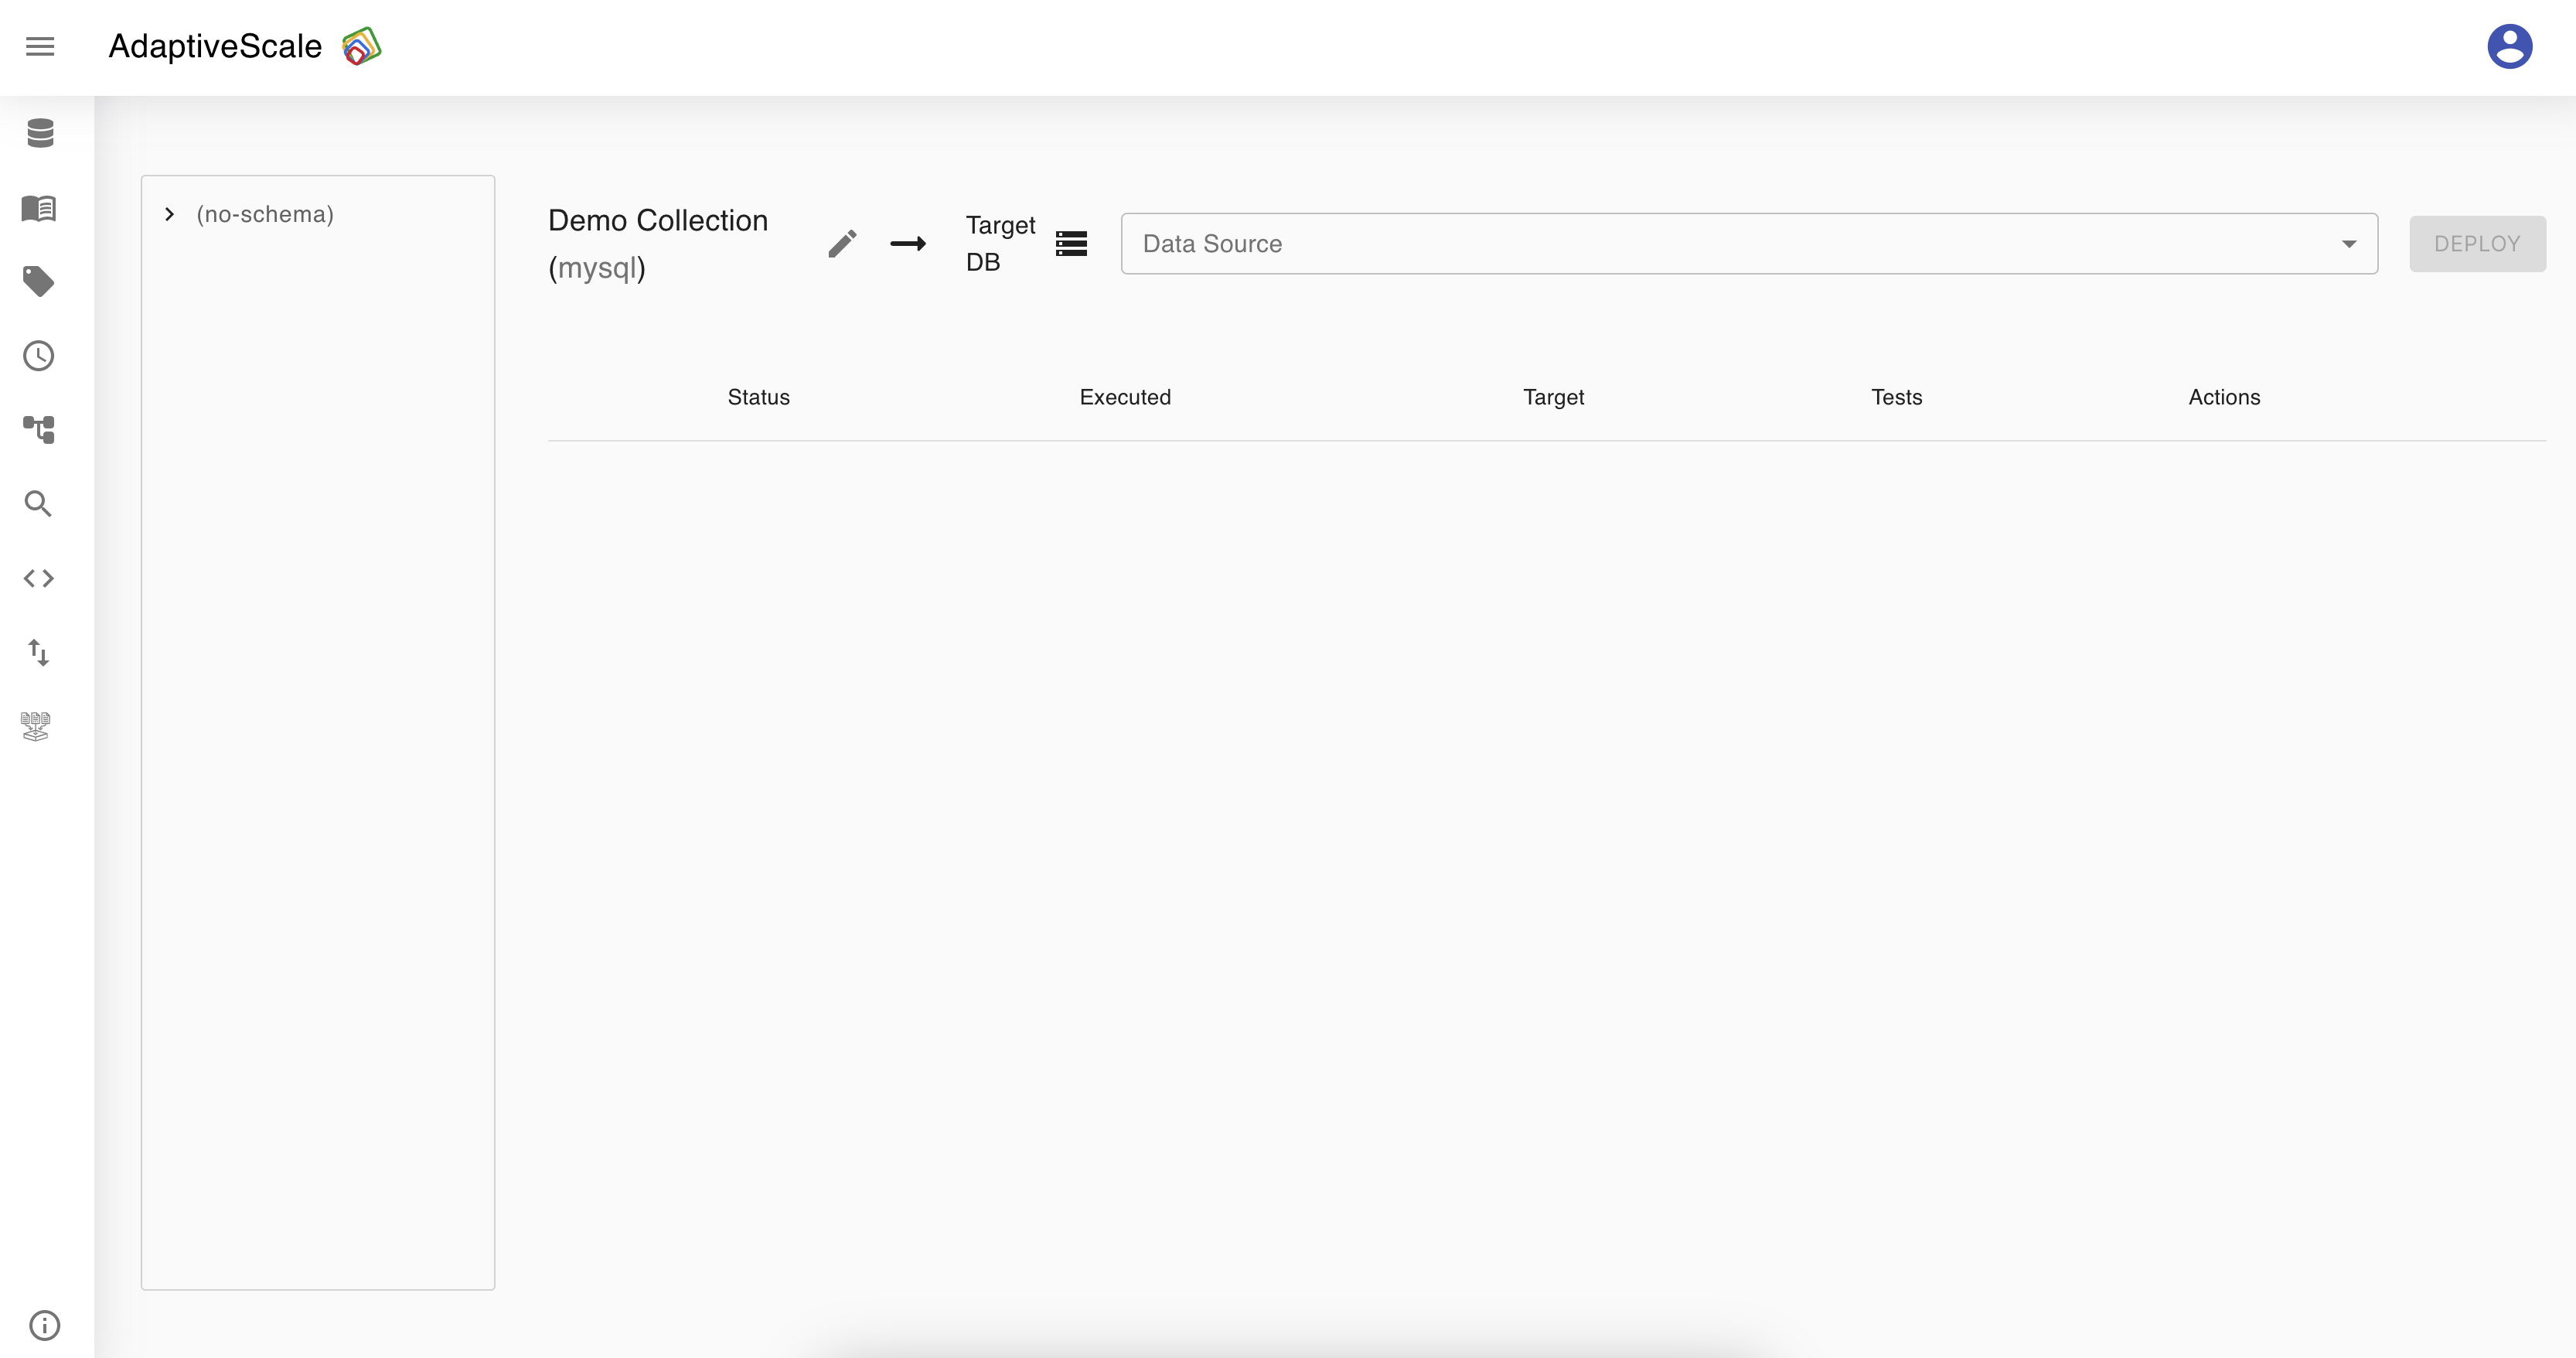
The collection that we created or updated can be deployed on a taget DB. This is done by clicking on the Deploy button from the list.
A new screen for Deployment is opened where the new schema is shown on the left of the screen, a collection that can be edited and a target DB which represents the location where the collection will be deployed. The user can choose from the list of data sources where to deploy the new collection.
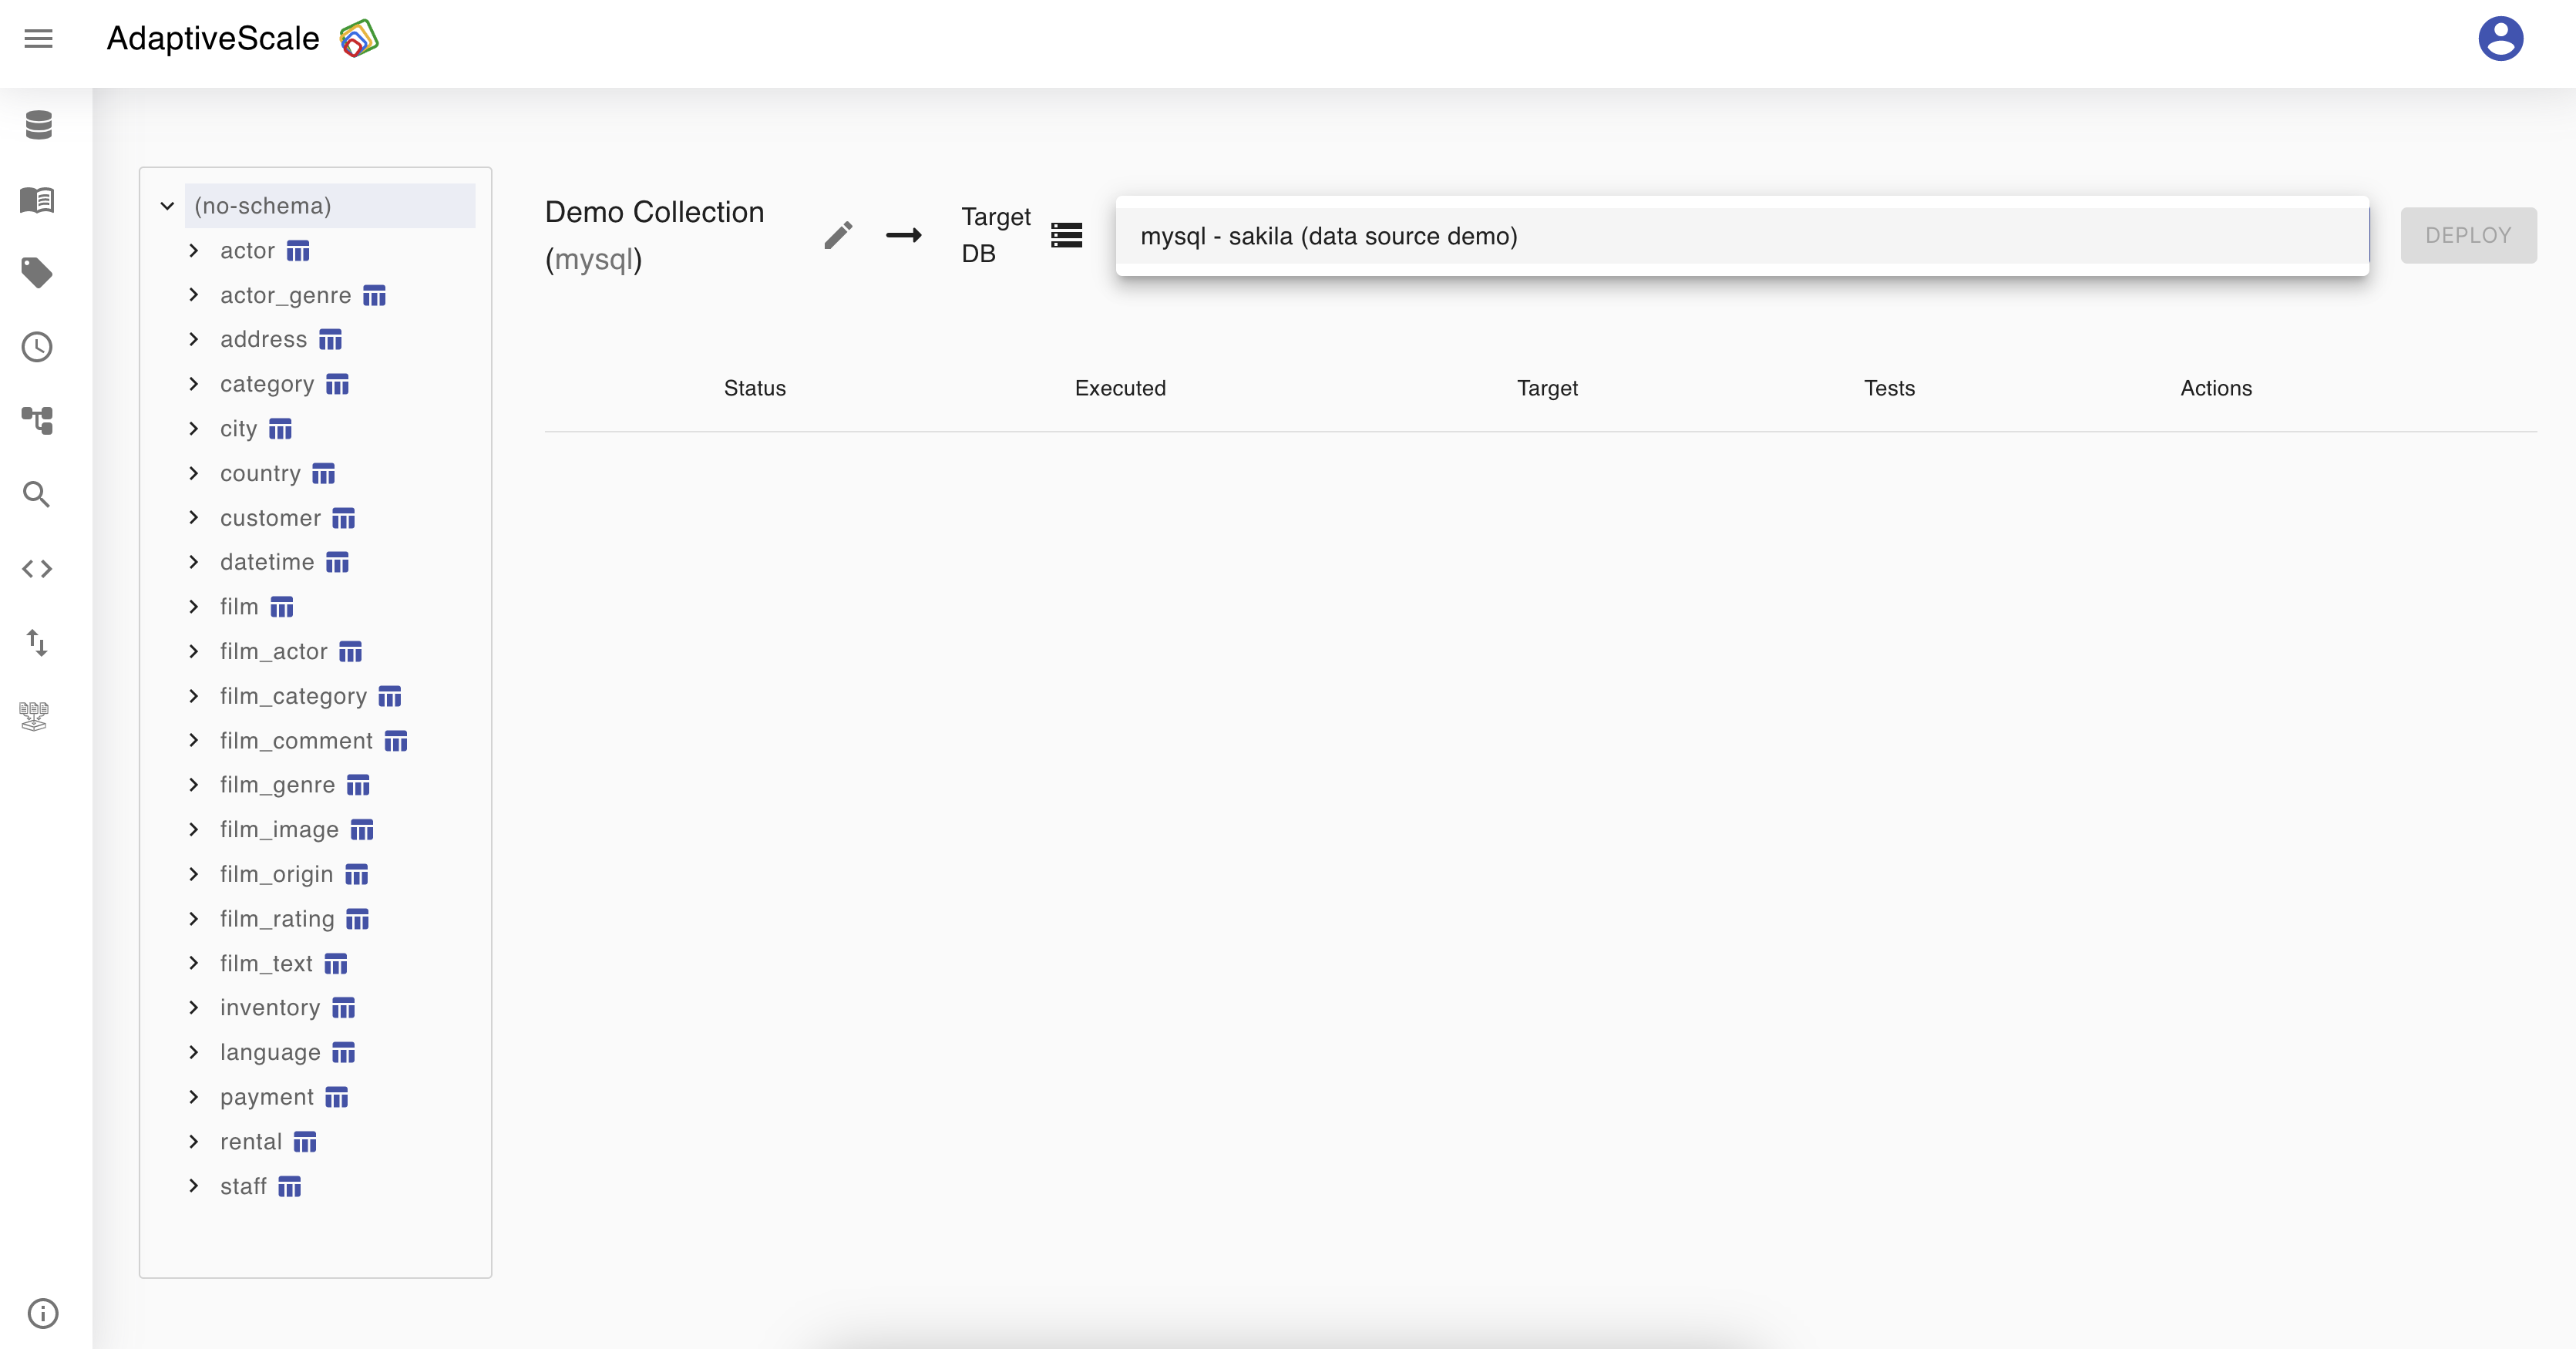
The last step after choosing a target DB will be to click on Deploy button so the deployment can start, and a status of the deployment with details will be shown.
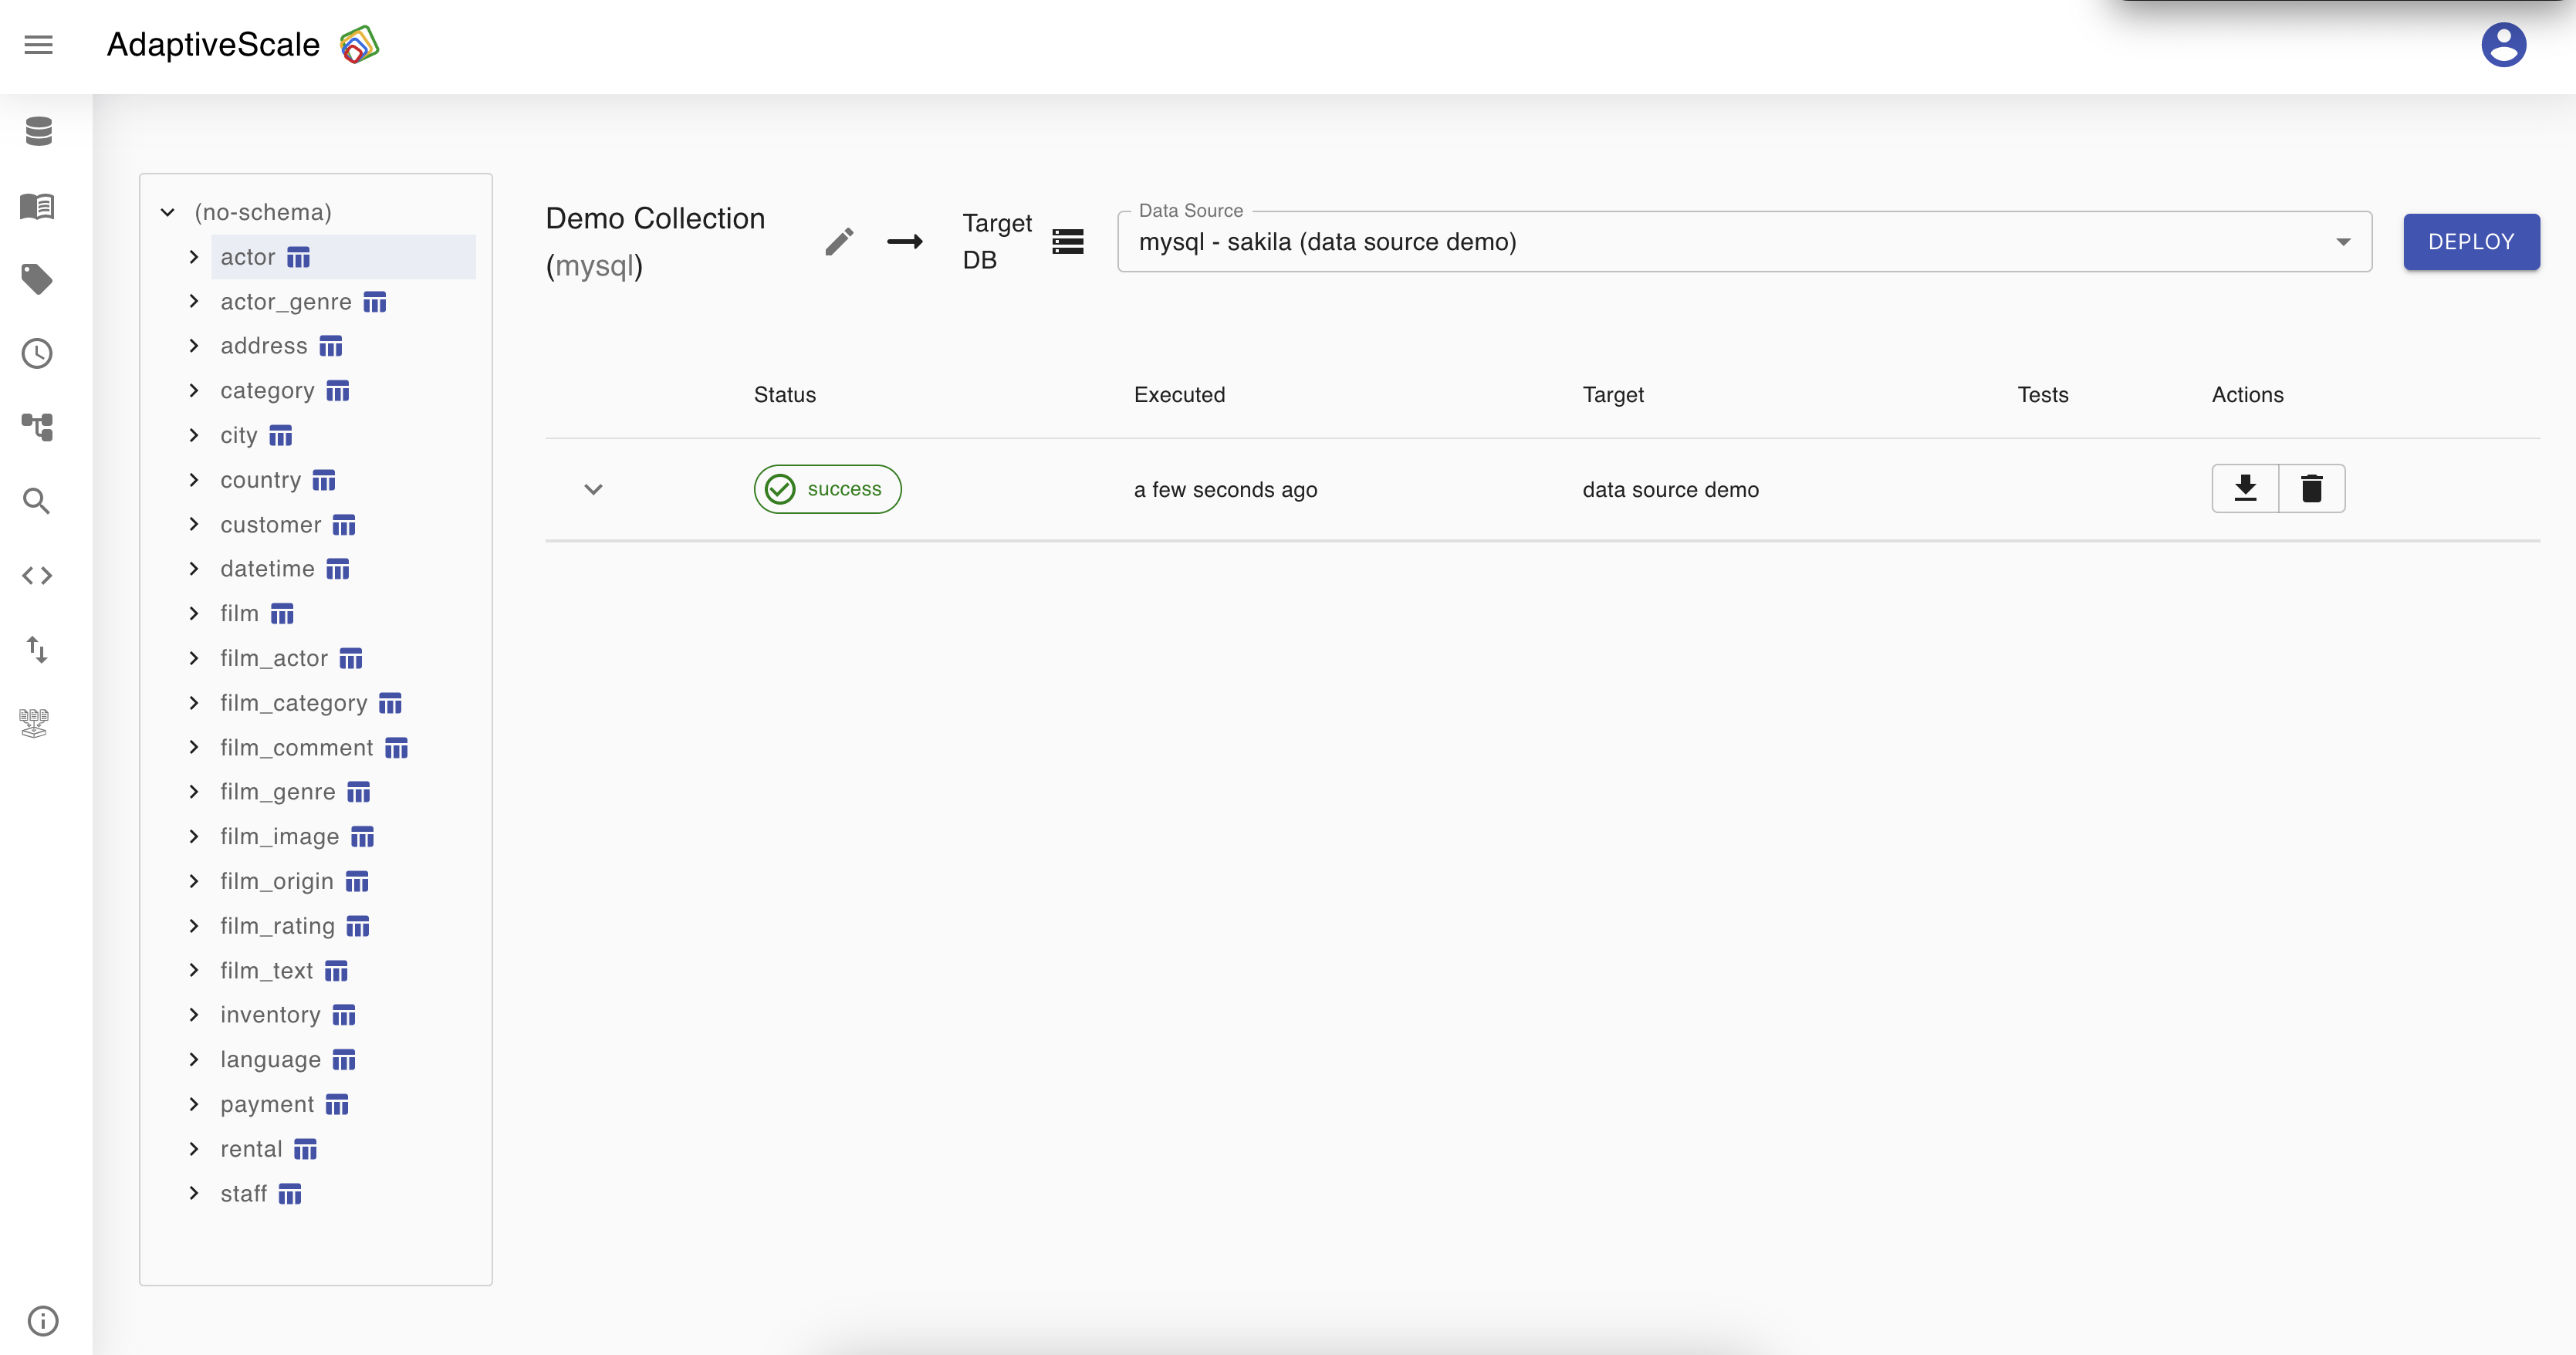
The actions for the deployment include download and delete.